User avatar
By kman
#4985034
Ok, I'm sure this will end SOMEDAY, but it's gonna be a while. LOL

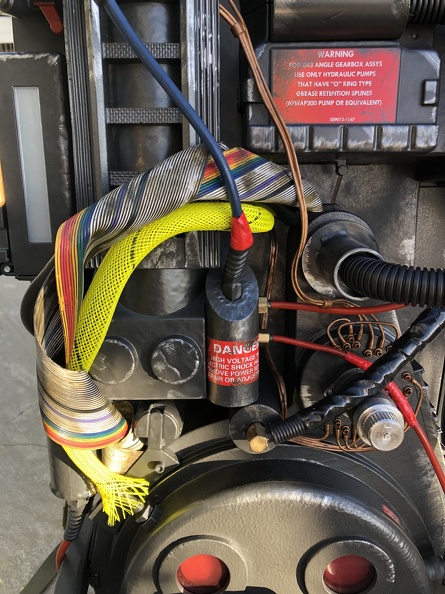
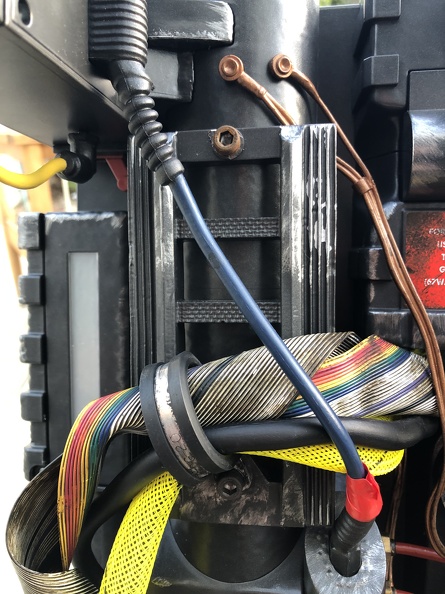
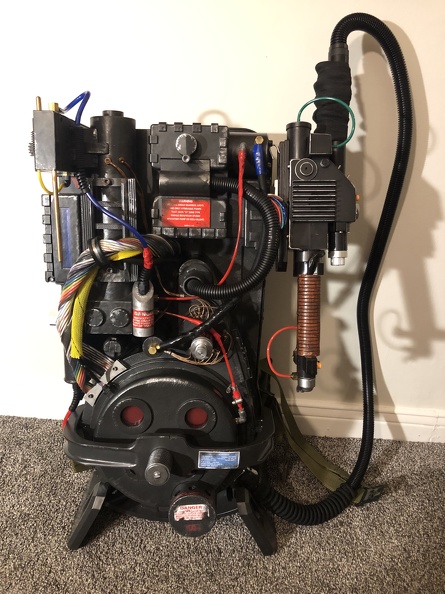
I probably should have done a full hero pack build sourcing all the parts, shells, etc., but I got in on the HasLab craze before I started on that. My wallet (and back?) is probably lucky that things were out of stock while I was debating which way to get started. Then my HasLab pack came, and I decided it was "good enough".

"I doubt I'll do much to the pack. Might monkey with DIY stuff but don't want to put money into it." - me, Nov 2021

LOL that didn't age well

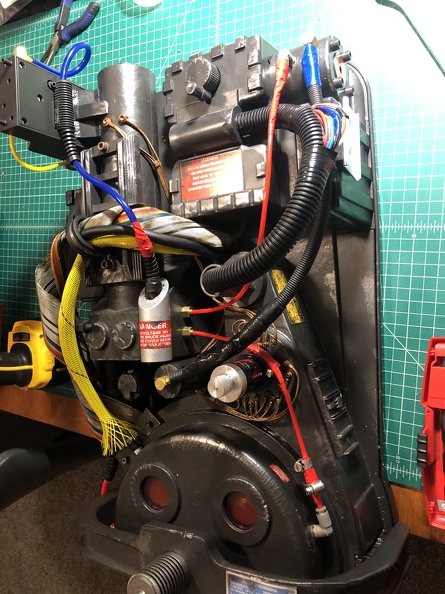
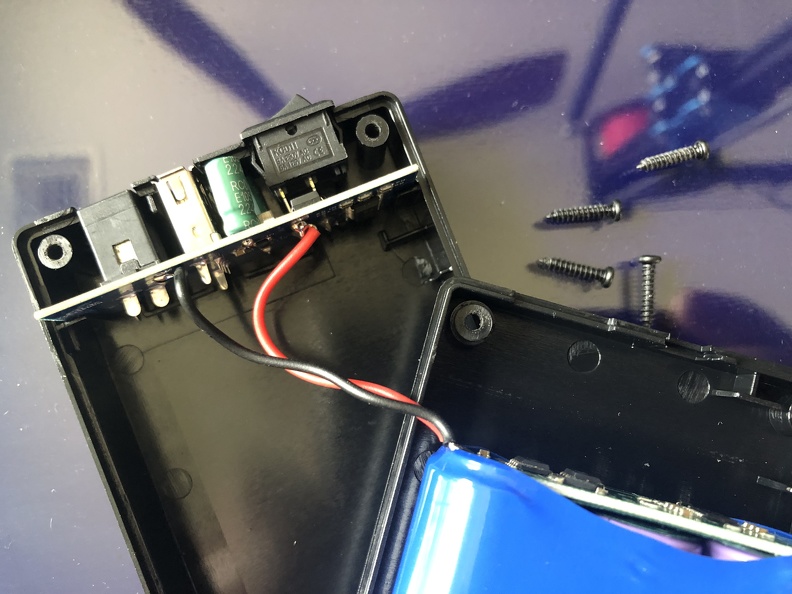
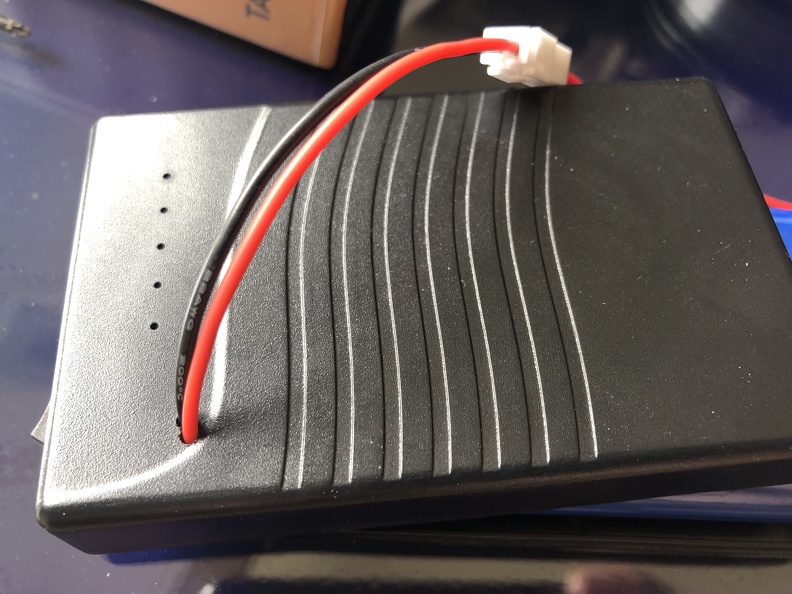
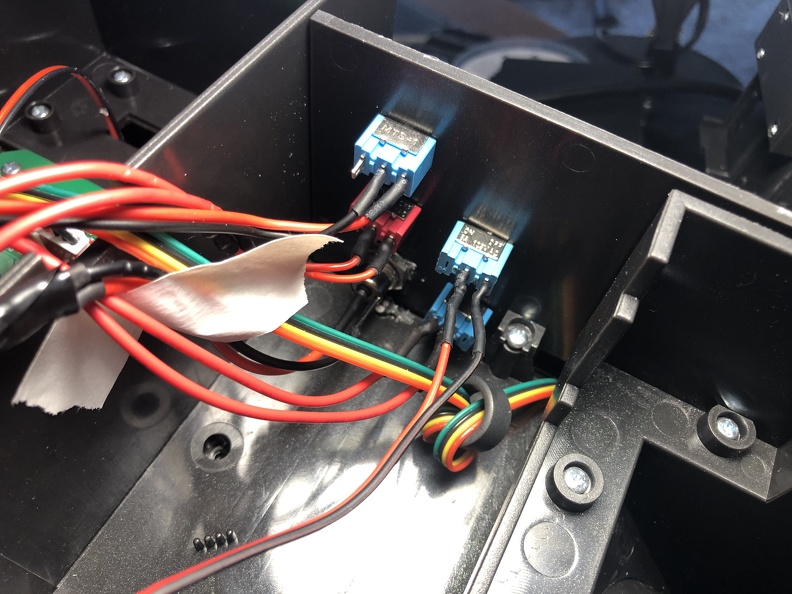
"I'm going to mod it to use a battery bank instead of D cells, but I'm not sure if I need to bother with any other mods. (Based on what I've seen of this pack)." - also me, Jan 2022 (pack in hand)

LOL that didn't age well, either

Fast forward to today, when I decided I need a work in progress (WIP) thread to track what I've been up to. *sigh* I rationalize it that I'm no longer planning to bother with a full custom hero GB84 pack with fiberglass shell, metal pieces wherever possible, the works.

Hope some of y'all enjoy this, but it's mostly for me to track my own stuff. So if you're not interested, feel free to click the Back button and move on. I'm also going to include some mentions of related things I did NOT to my pack, but this thread will *mostly* be about my pack, and modifications thereto. Starting at the very beginning:

October 2021:

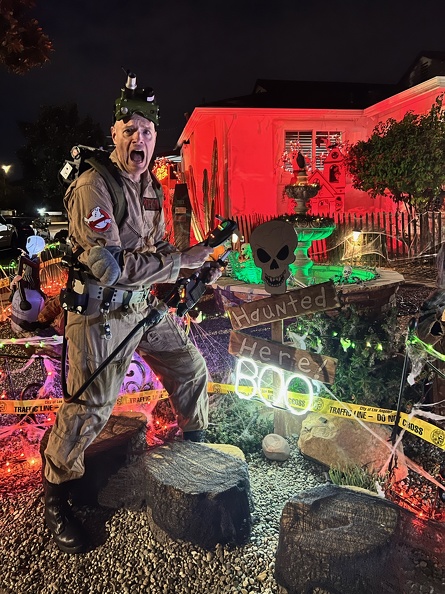
The obsession started with a buddy, as it often does. I've been a longtime fan of the movies, of course, but a buddy started getting into Ghostbusters and joined a local group and suited up, with some amazing photos resulting. I decided to join him, just before Halloween 2021, and dropped a bunch of money here at GBFans (had my existing workable combat boots and a surplus Nomex flight suit), and thus began the obsession. Costume basics from here, some patches from Katarra8 (GB was sold out at the time), a Spirit Halloween PKE meter and Trap, and I was in business! And wanting a pack BADLY. So I picked up a Spirit pack, too, since that's all you could get and I wanted something for Halloween. Oy, 80% feels TINY when you're a big tall guy.

Image

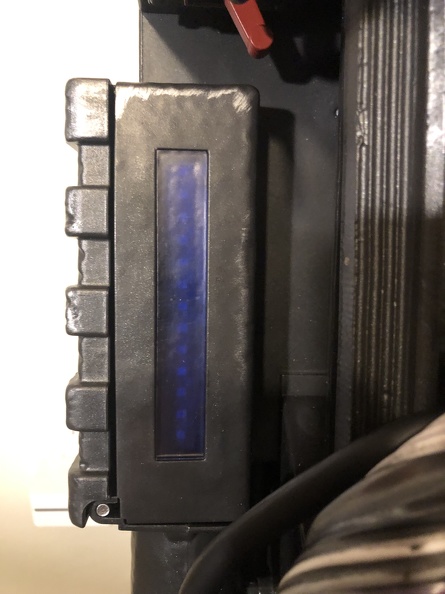
I immediately started the mods. I modded my Spirit PKE for Halloween with a really nice upgrade kit for the screen from EpicallyGeeky (Etsy) (including removing the back plug, a full repaint, and weathering). Pretty pleased with the results! (Although I'll be doing to motor mod, next, I think...)

ImageImage

Mid-Nov 2021: I got a belt gizmo from Flatland Props. Obviously not 100% screen accurate, but reasonably priced, and looks great, especially with a group of people who all have them.

Image

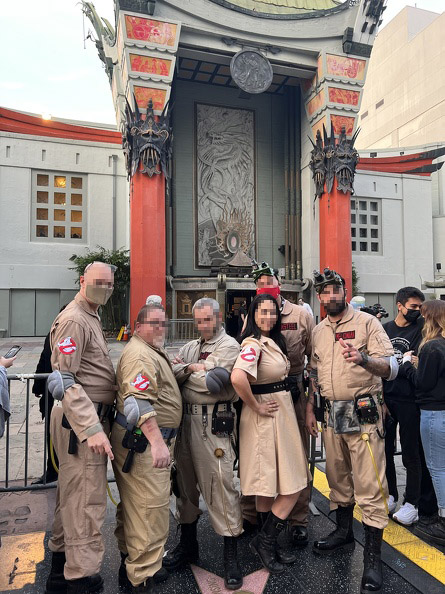
The crew and I went to the Afterlife premiere opening weekend at the Chinese theater in Hollywood. Good fun! No one brought packs, on purpose... no one wants to hassle with a pack while you're trying to watch a movie. And only a two of us had anything better than a Spirit pack, anyway. (If that) (faces blurred to protect the guilty)

Image

Shenanigans resulted, after the premiere, and the obsession grew.

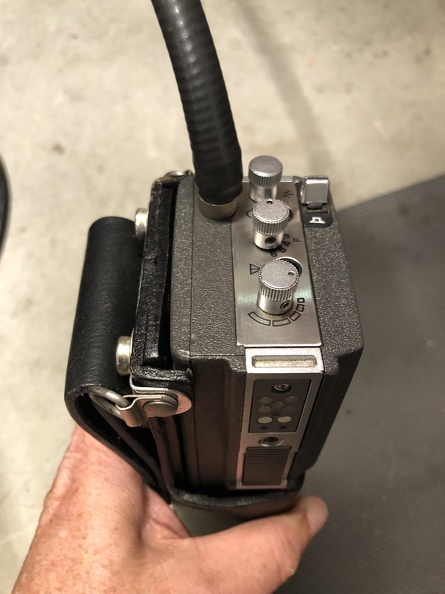
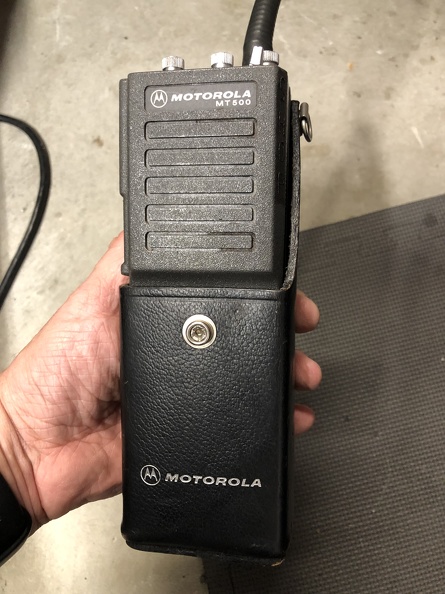
Within a couple of weeks, I scored an accurate vintage Motorola MT500 on eBay.

ImageImage

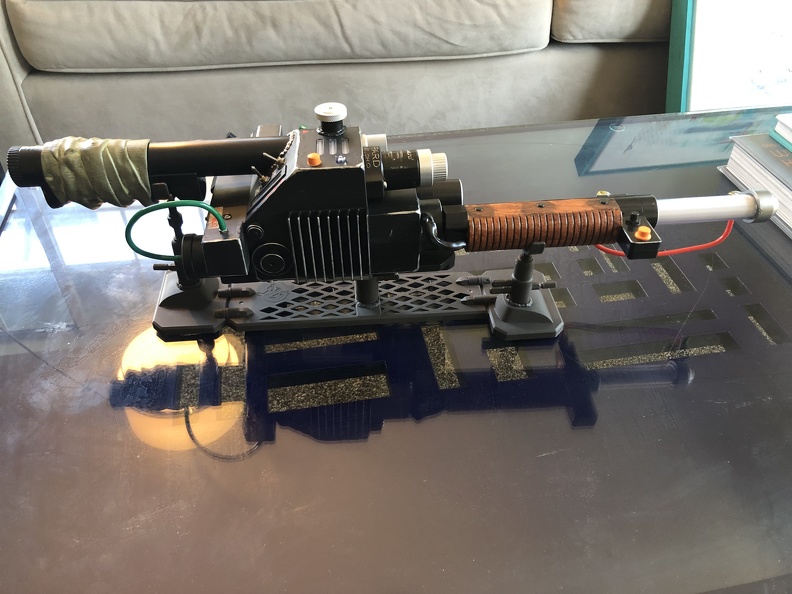
April 2022: Wand Day

This thing is beautiful and perfect in every way. (famous last words)

Image

... and then things quieted down for a bit. Still waiting on the pack...

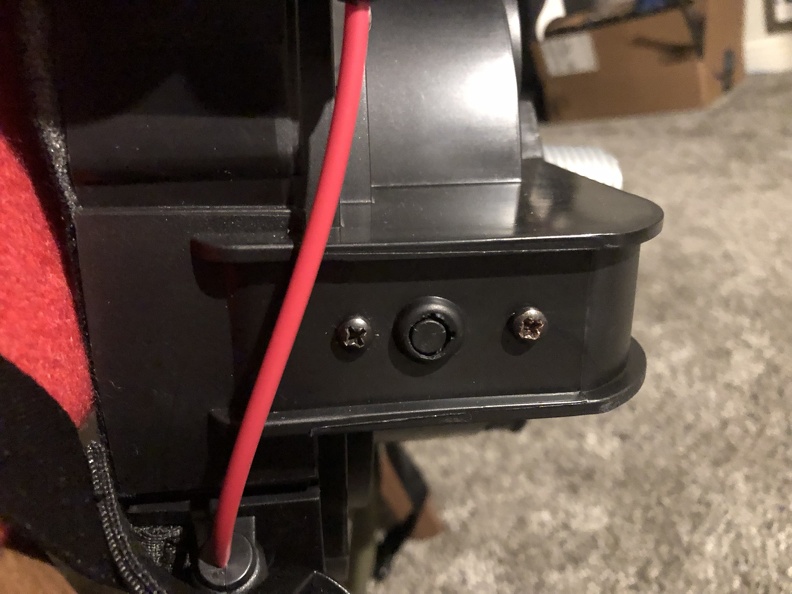
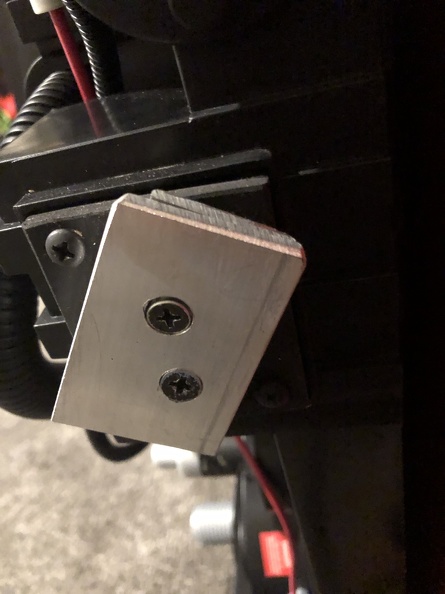
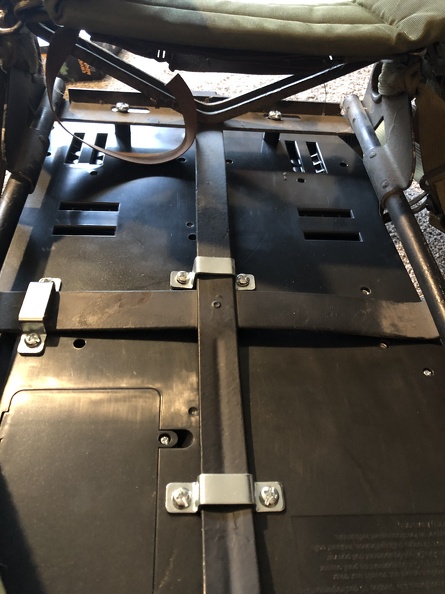
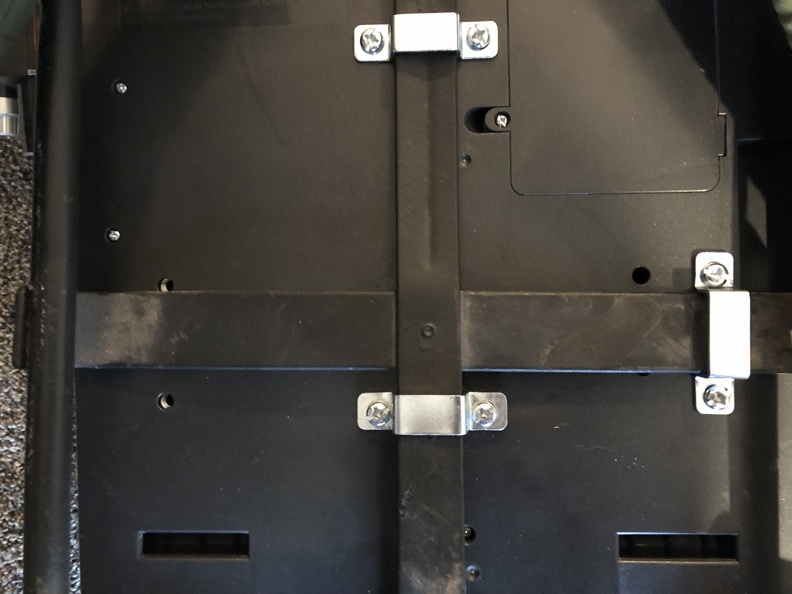
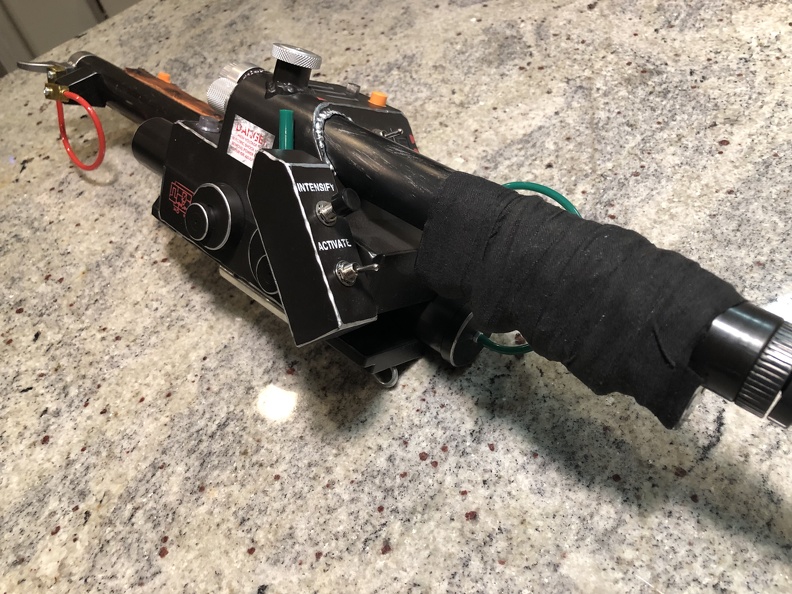
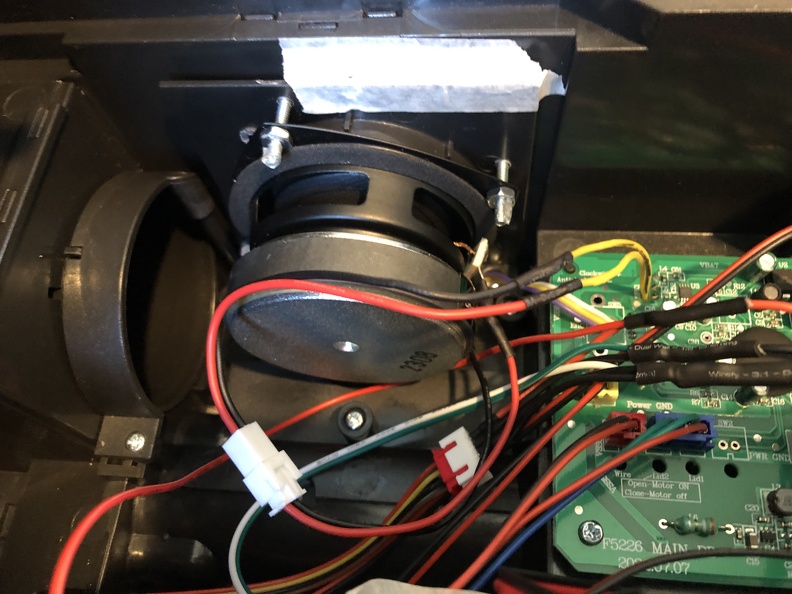
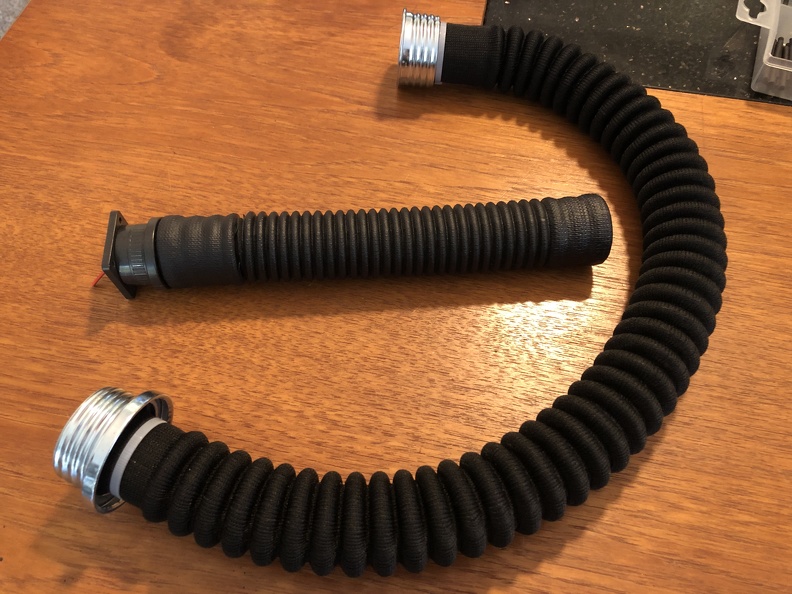
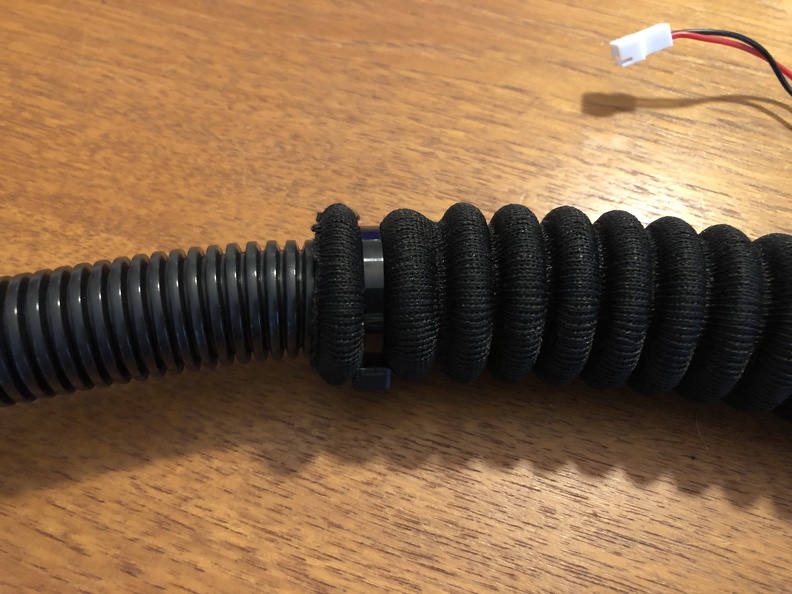
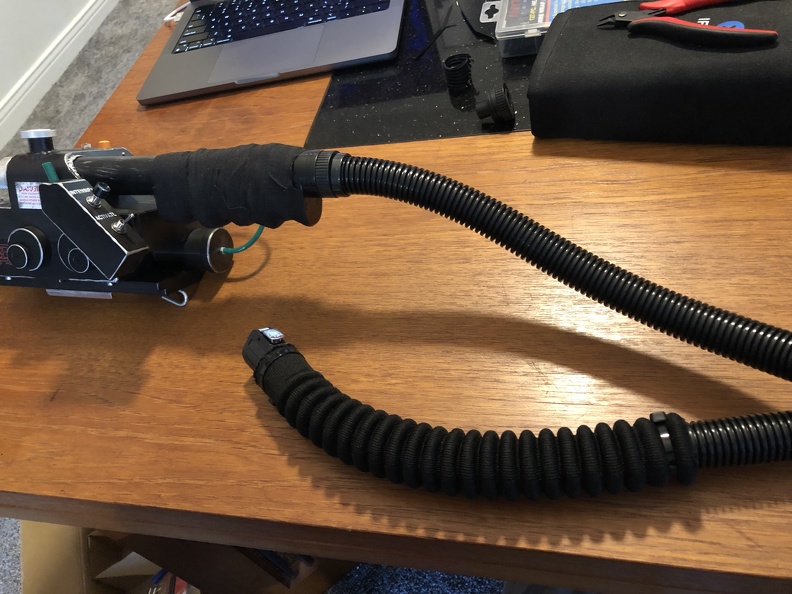
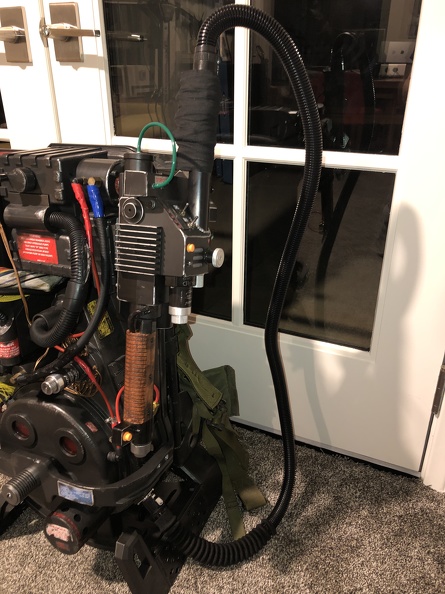
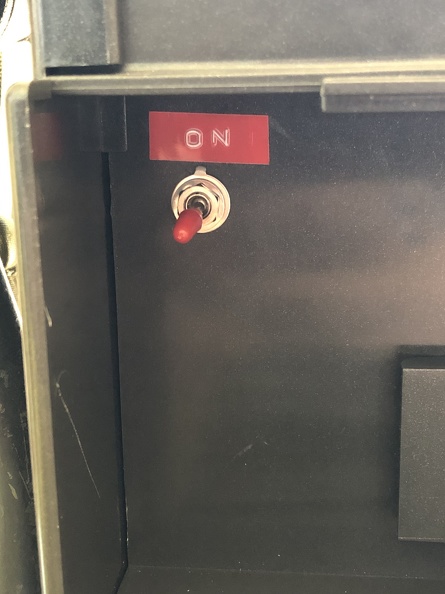
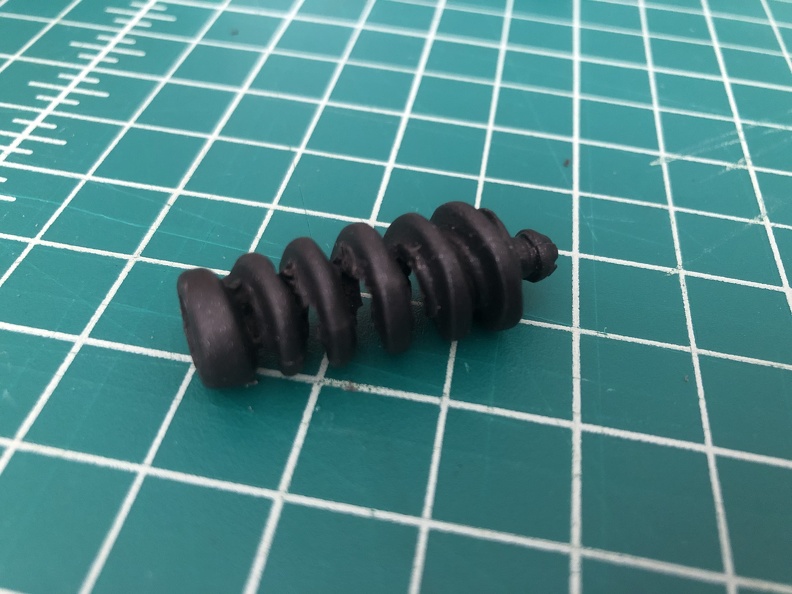
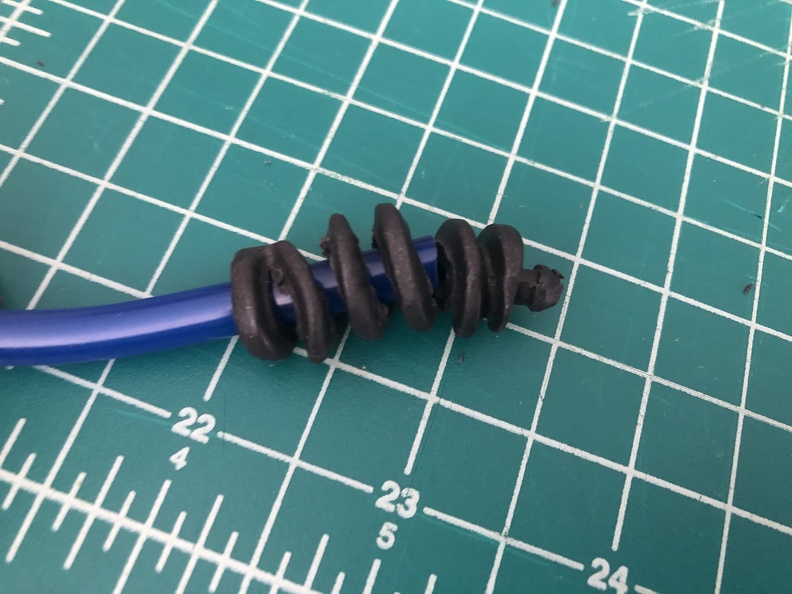
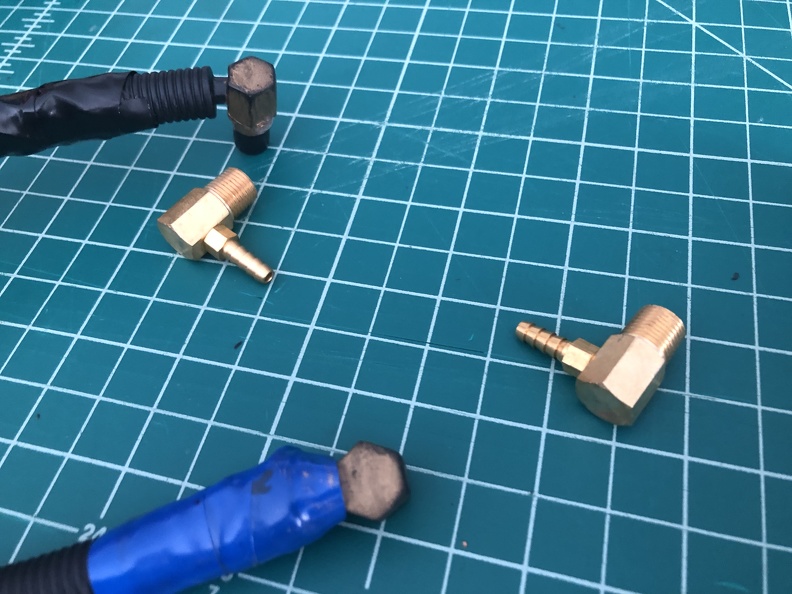
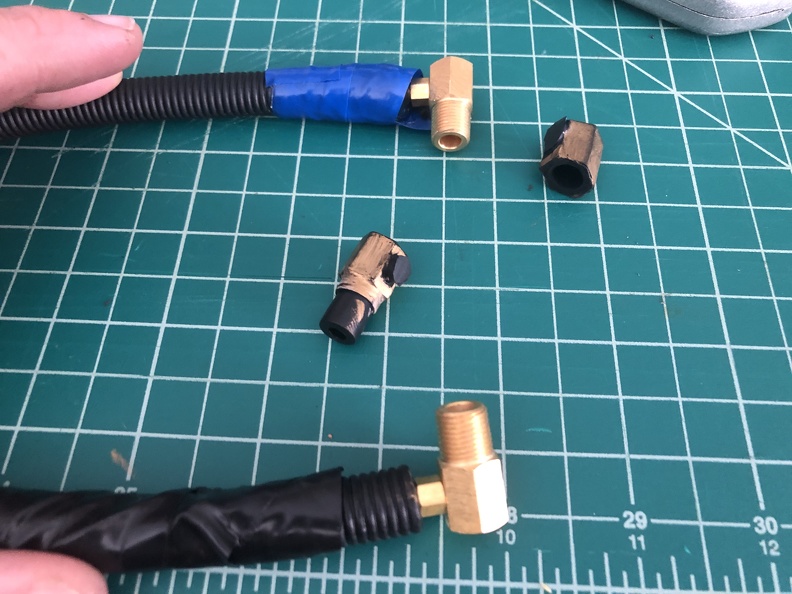
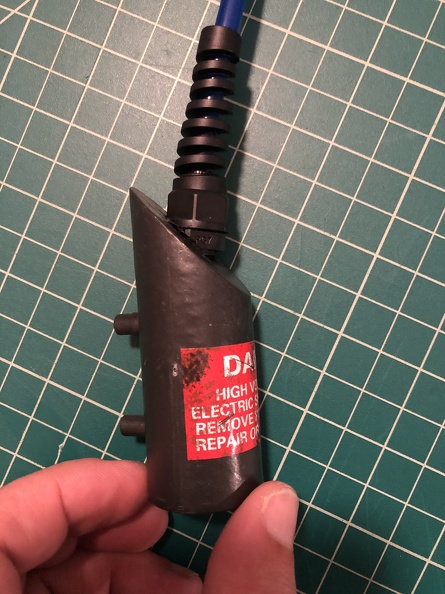
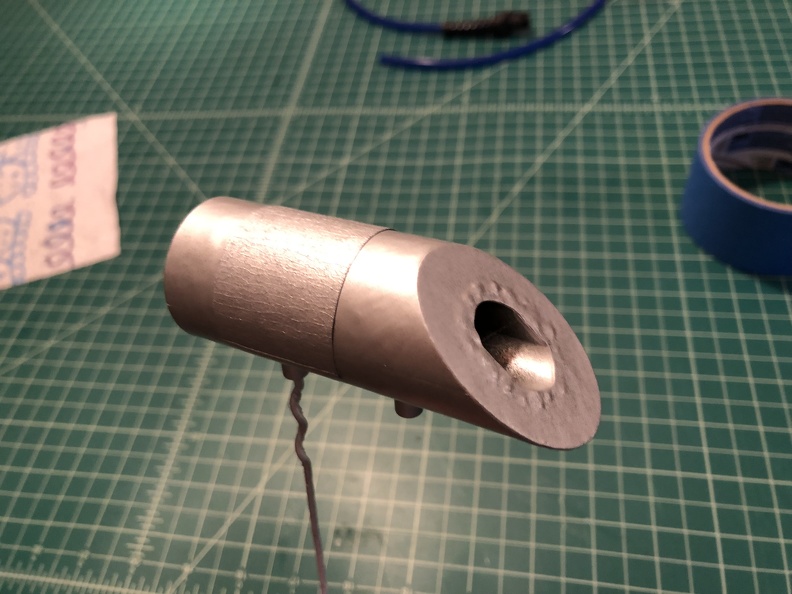
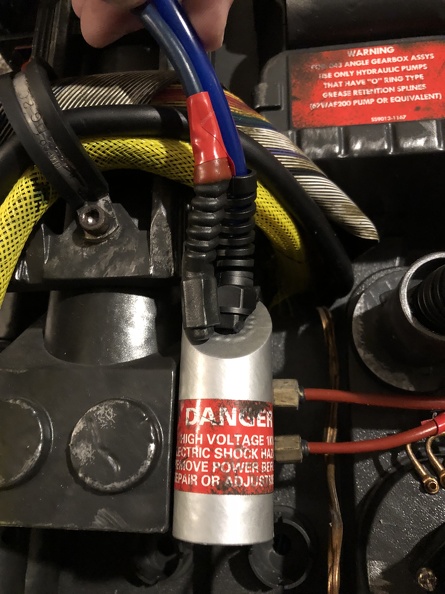
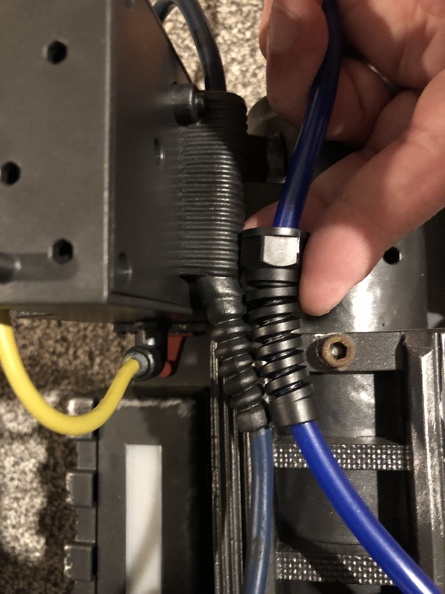
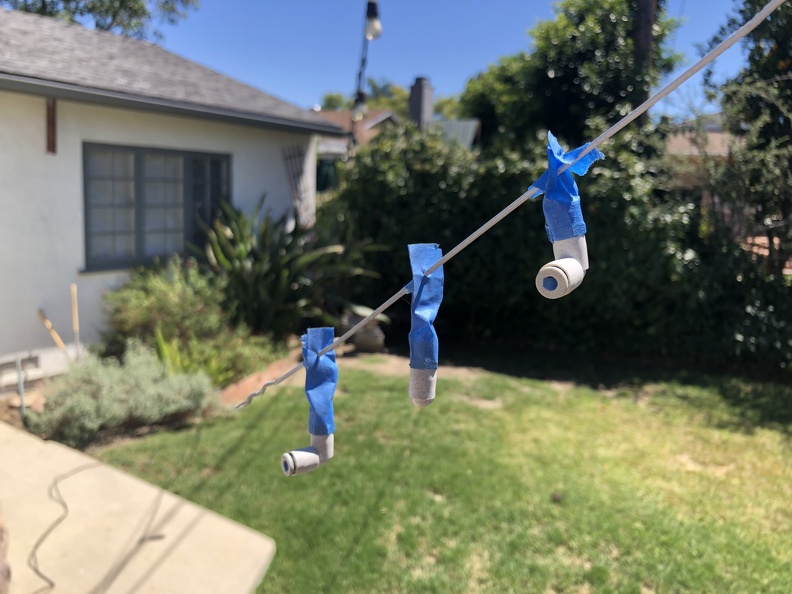
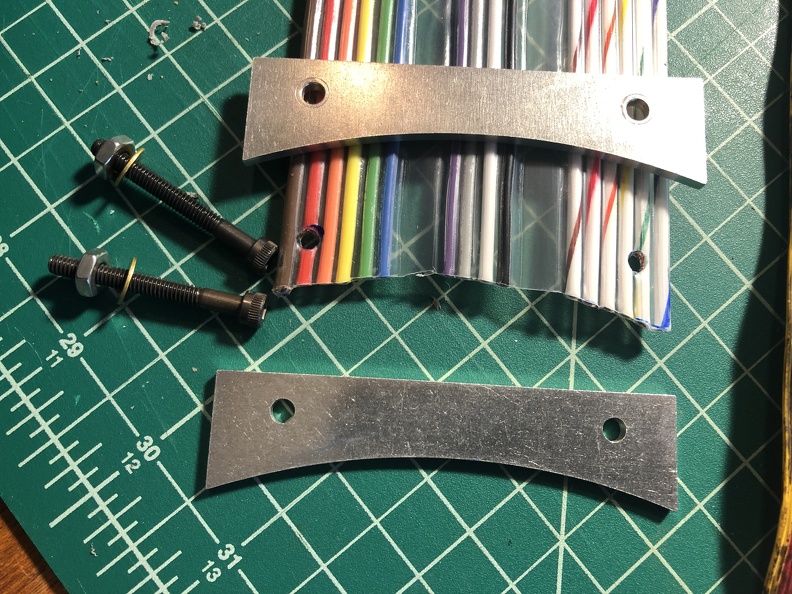
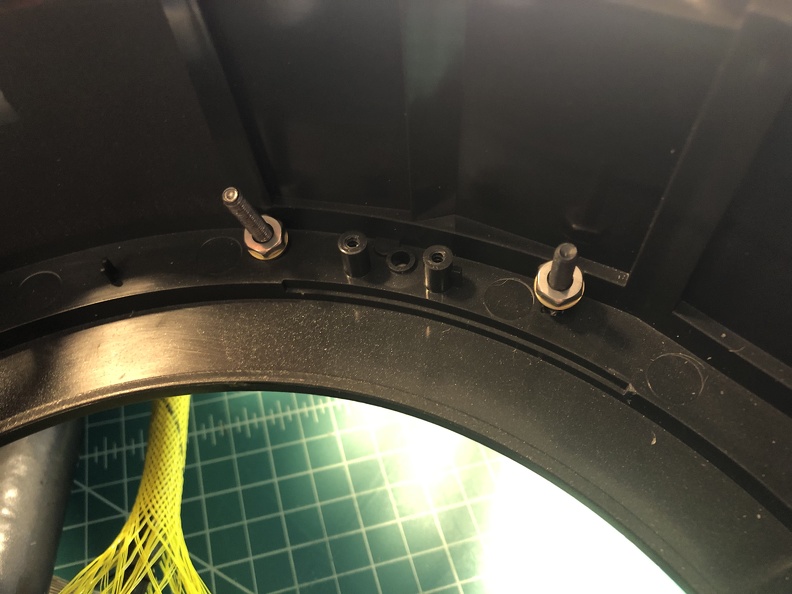
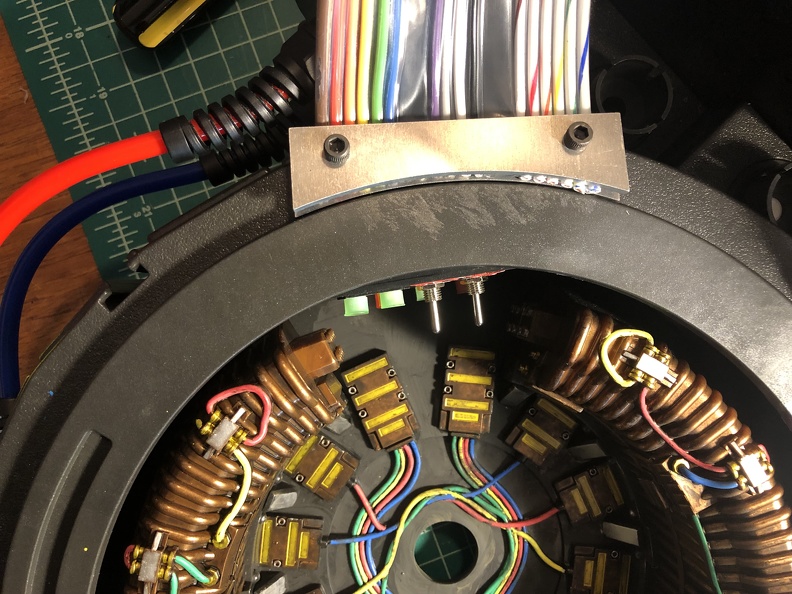
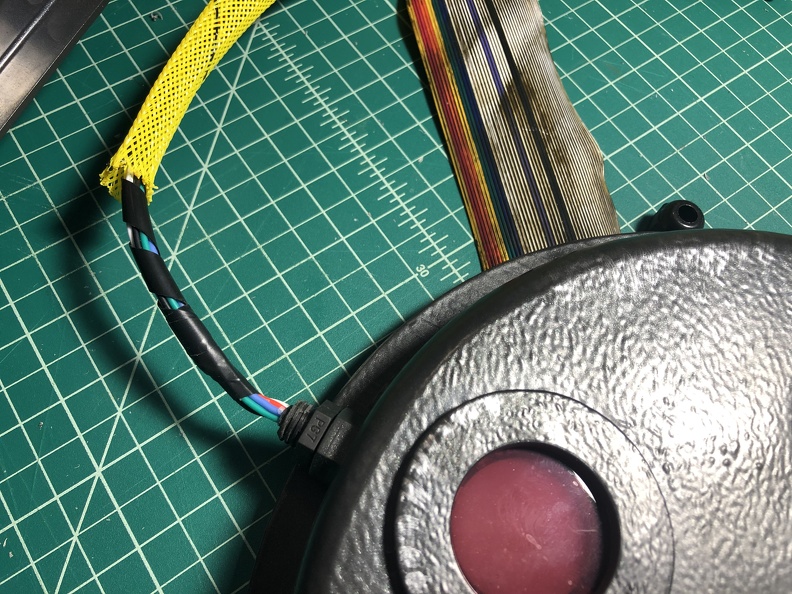
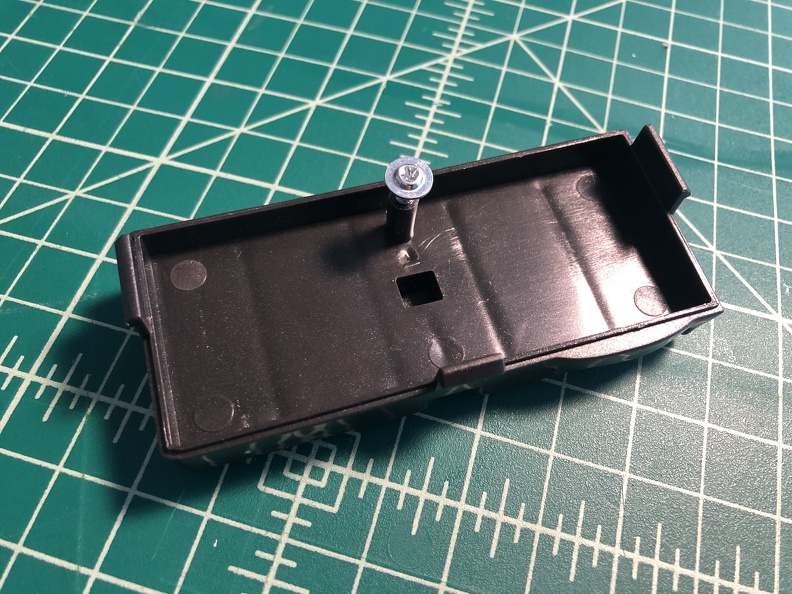
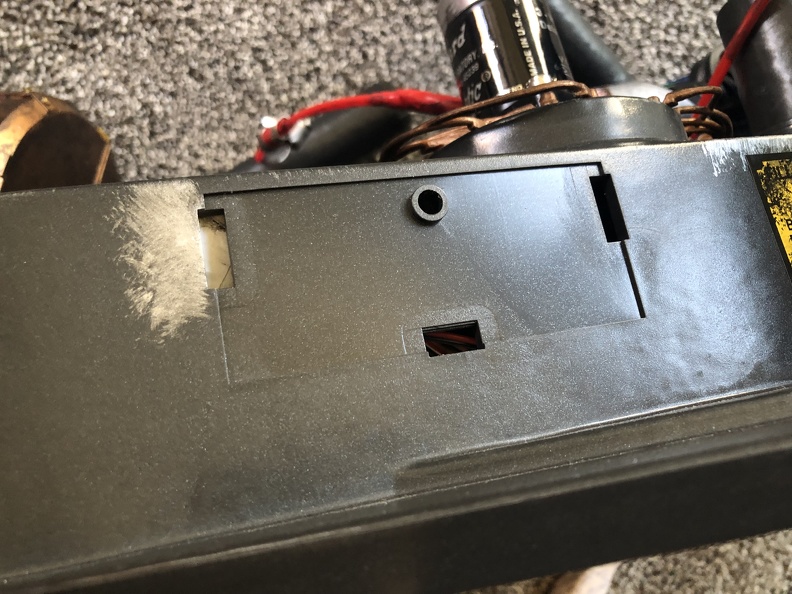
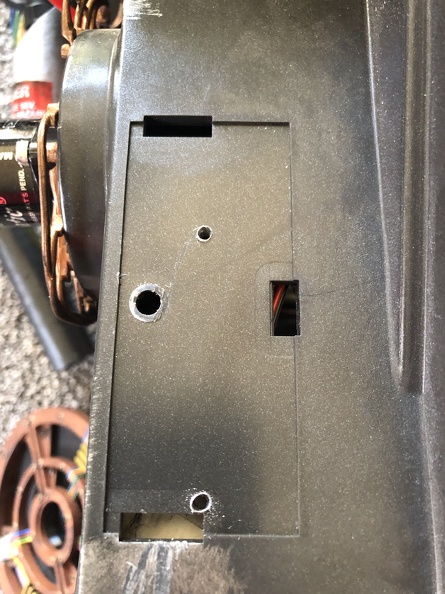
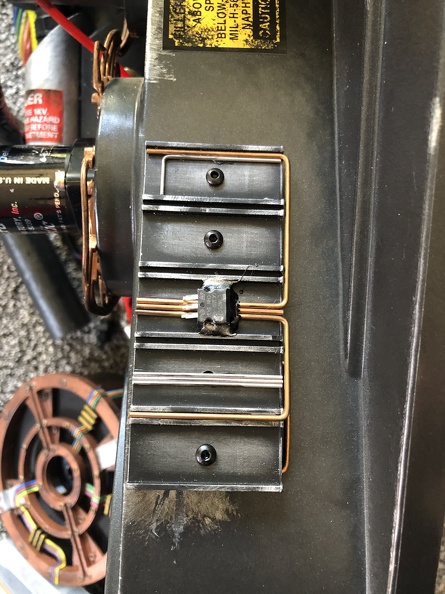
Halloween 2022. Still no pack. But I was jonesing for GB action, so I hacked together a temporary attachment to "connect" (read: tape) my Spengler wand to the Spirit pack's loom. I tore it down, removed the stock "wand" and relocated the switch to the pack's side, so I could trigger it on the sly. I even fabricated a decent wand V hook mount for it out of raw aluminum stock. (The upgrade obsession begins...)

Image
Image
Image

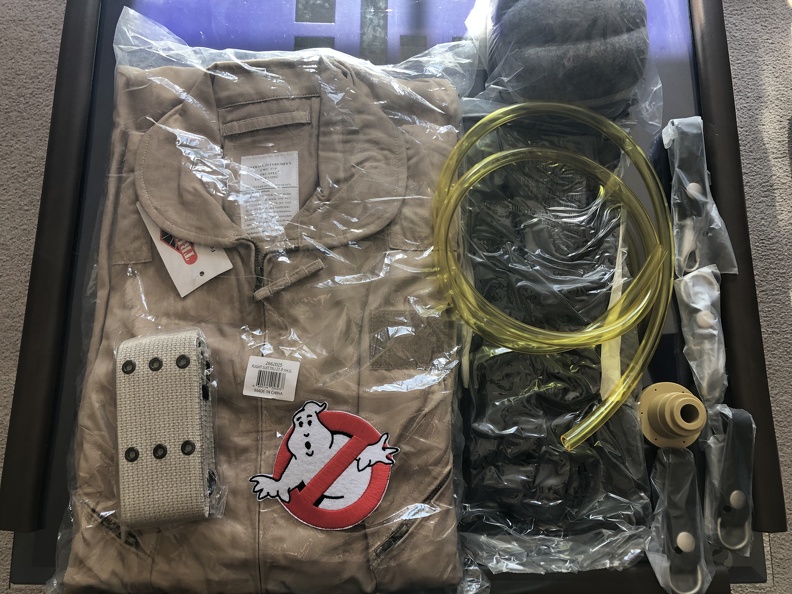
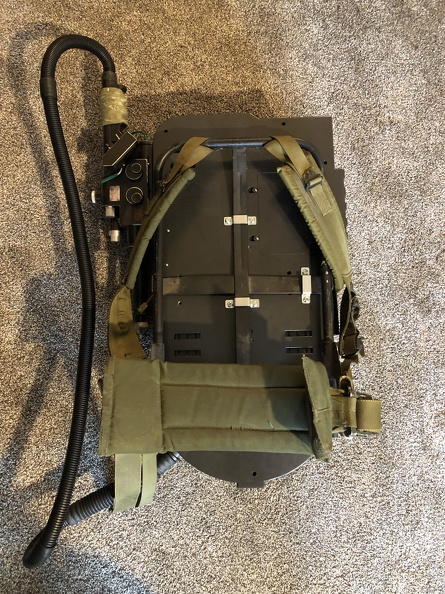
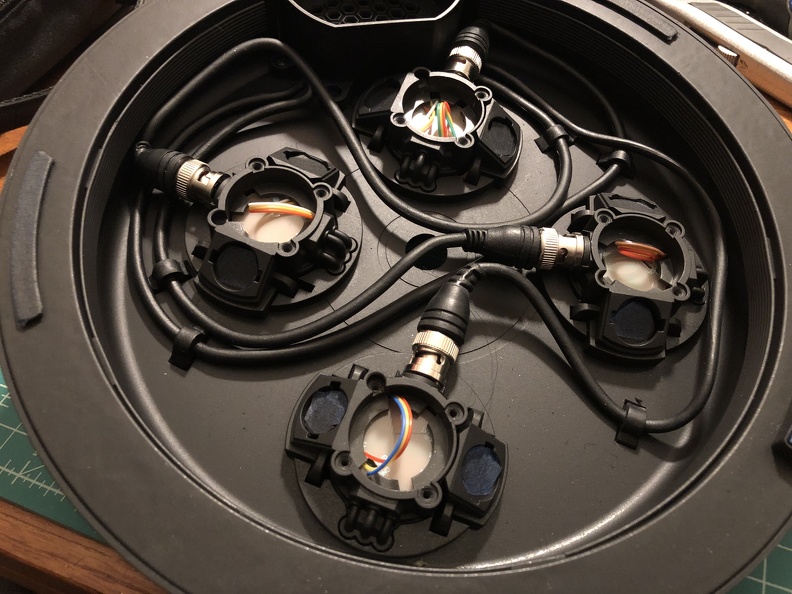
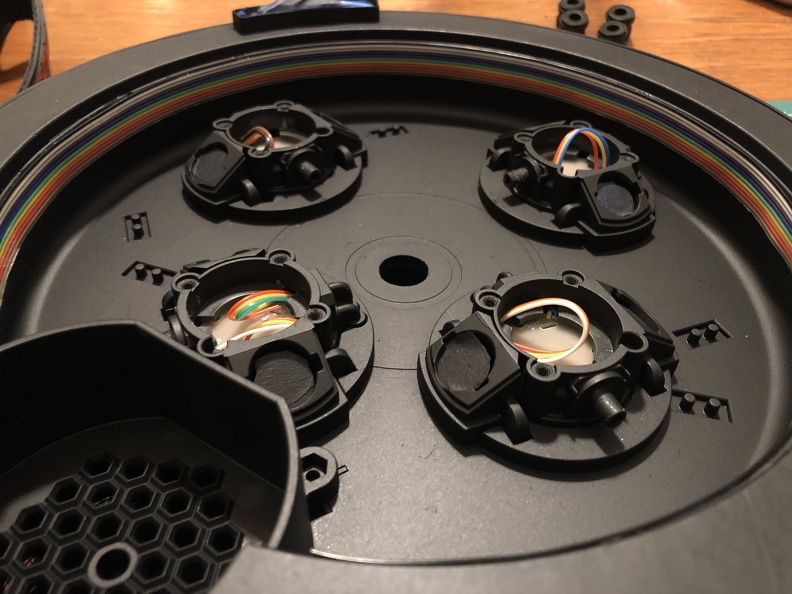
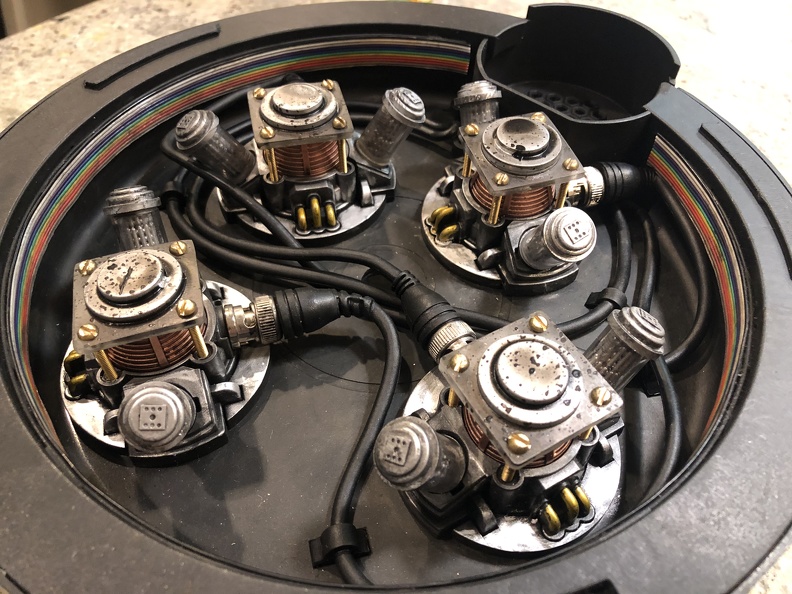
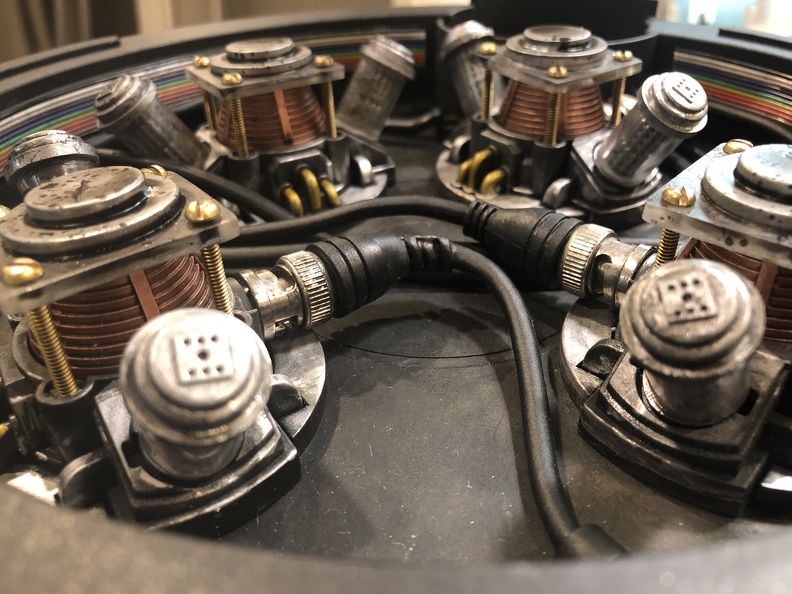
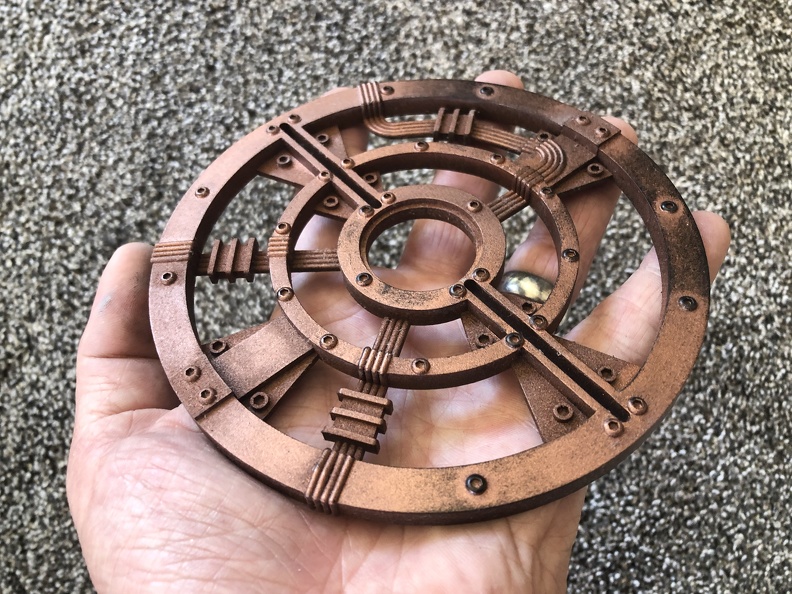
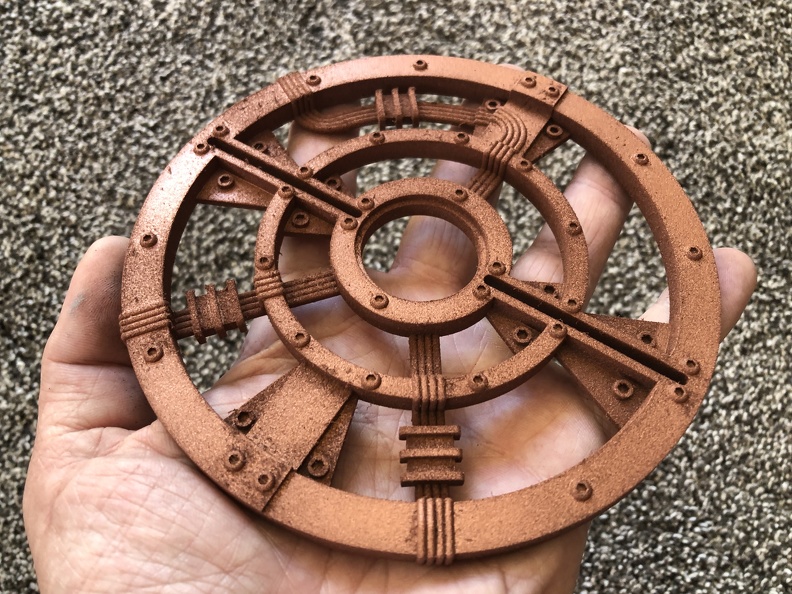
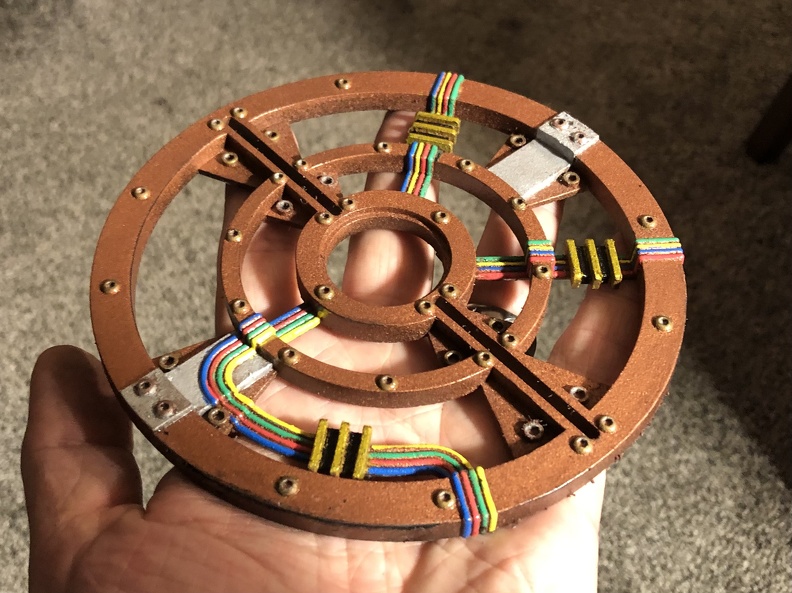
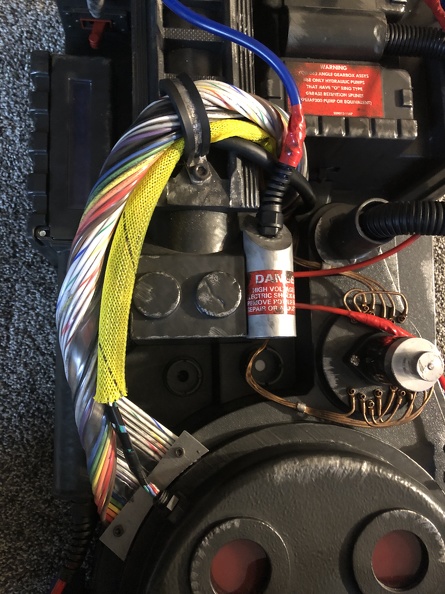
Jan 14, 2023: BBB day. Yay!!! (yeah, I bought more than one)

Image

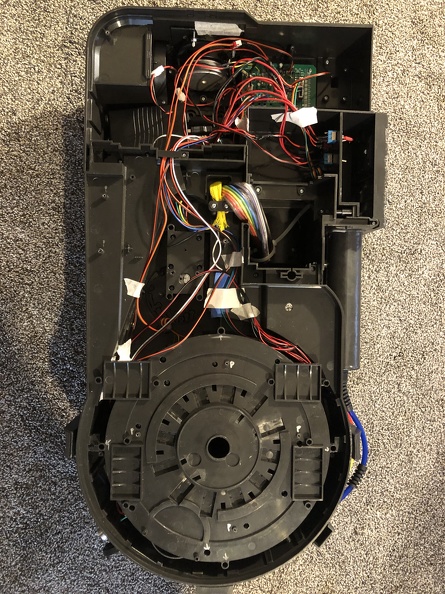
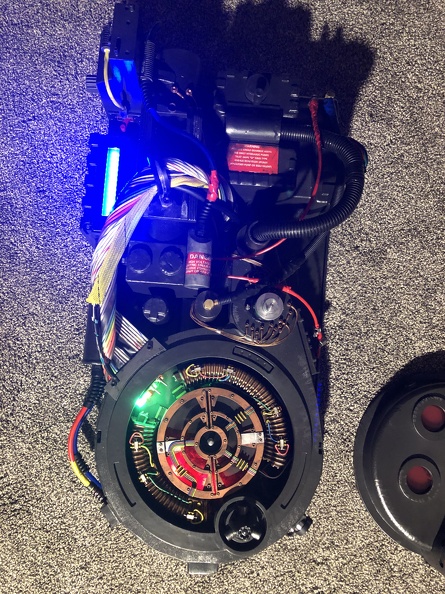
See? Packs! This is the right sub-forum for this post after all... LOL

To be continued in the next post...
User avatar
By kman
#4985035
Jan 14, 2023, continued:

Items in hand: Wand, pack, vintage real LC-2 frame and straps, GBFans frame padding tube

I had already owned the LC2 frame for ... over a decade. Possibly verging on decades, plural. So I wasn't eager to splurge on a vintage LC1... OR buy a low quality modern replica. Even though I know technically GB1 was an LC1, and GB2 was an LC2... and AfterLife was a low quality modern replica. Meh. Let's see if the good stuff works?

Image

Spoiler: It works. (Not perfectly, perhaps, but more than "enough") Spoiler #2: I picked up a Fox Outdoors LC1 just in case, but I'll save that for one of the other packs (read: sell it with it, probably, else it'll be fabulous for my kid)

ImageImageImage

Adding the GBFans pad made it even better. I used black gaffers tape, and I'm happy with this decision. Tho I may work on the exact taping pattern methodology and re-tape it, someday, as there's just something I don't quite love about this initial attempt, even though it works.

Image

Pack is SOOO GOOD. It's like, nearly perfect.

Right?

To be continued in the next post...
RiverofSlime liked this
User avatar
By kman
#4985036
January 15, 2022

Mod #1. Yellow sheath weathering. Still not really violating my original intent. But this is the one area HasLabs really dropped the ball. The kevlar sheath is BRIGHT and clean, and stands WAY out on the pack. A little spray paint knocked that down very nicely, though. Quite pleased. Just a rattle can dusting of some standard Rustoleum flat black, and some sort of brown for a little depth, to knock down the brightness. If anyone actually cares, just ask, and I'll go check what cans I actually used. Looks overdone in this pic against the white paper towel, but check the next one, against the pack.

Image

Sooo much less "in your face" now, even with nothing else done. (I had not replaced the clamp yet, in this shot)

Image

Then I watched Adam Savage's Tested video, finally. #$&%*%. That was a mistake. (Quoth my wallet)

Bought some "quarter twenties" (1/4-20 x 12" socket head cap screws) on Amazon, and force rusted them for realism. I'll replace some of the plastic ones. Still cheap, and a super simple mod.

Image

Bought some of the PEX wire sheath. That's a stupid easy mod, too, right? And some buddies bought some of my extra for their packs, so it was even cheaper, and others benefited. Win-win!

Image

But if we're doing that, I really need the accurate cable holder, right? With actual metal, that goes all the way around, instead of the weird little rainbow curve of the HasLab. (Even though it looks quite nice). Especially since I'll definitely be upgrading the stock cable to a proper GB1 cable, at some point. Spent WAY too much buying it from Charlesworth Dynamics on Etsy, but since I won't be doing much to this pack, that's probably fine. Right? RIGHT? (Cue kicking myself since GBFans has them for so much cheaper). Oh well. It looks great. It IS great.

Image

Feb 10, 2022: Wirefauna GB1 cable came. GORGEOUS. Going to have to think about how I want to install it, though. I'll hold off for now.

Image

March 2023:

Picked up ALL OF THE ELECTRICAL tape. Because, as Adam Savage noted, as nice as all the molded-in detail was, nothing looks more like grimy electrical tape, than... grimy electrical tape. Got the good 3M stuff. Not like I can't make plenty good use of electrical tape around the house (light electrical work and such), so it's not a waste. Still... ouch. I've never bothered with the good stuff before, let alone 6 rolls at once. But that's ok, again, because it's a multi-use purchase. That means those upgrade dollars don't count... right?

Image
Image

And at a friend's suggestion, I took some gold sharpie to all the "brass" connectors, all of which looked FANTASTIC and made a HUGE difference.

Image

Because I wasn't quite ready to tear open the pack and do the full GB1 cable install just yet, I cleaned up the overly-grimed stock ribbon cable. Super easy with a little acetone. Left side stock, right side, just a quick wipe down. I didn't take ALL of it off... I still wanted it very weathered. I just also wanted to be able to see some color.

Image

Starting to look remarkably better, at soooo little effort! :D

Image

At this point, I also installed the proper P clamp on the ribbon cable, and cut off the plastic screws in favor of the real quarter-twenties. A touch of weathering on the shiny metal of the P clamp. (just a quick little black acrylic wash)

Image

Lots of small upgrades remain, but I was pretty darned pleased with myself after these tiny steps. :)

As another "simple" upgrade, I really wanted to get those fake hose clamps replaced, too. But I didn't want to buy a whole box, $20+ worth, buying 20 or so at Amazon. So the search continued for the right ones, casually and slowly.

To be continued in the next post...
Last edited by kman on August 5th, 2023, 12:43 pm, edited 1 time in total.
User avatar
By kman
#4985038
May 20, 2023:

After going to god knows how many random stores, trying to find the tiny 6mm clamps that were NOT combo threaded and didn't have the weird plastic knob to turn them. Finally happened to check at Home Depot (I had assumed they would NOT have the right ones, for some reason) and boom, $1.88ea later, I'm set. *facepalm*

Image

July 1, 2023

One of the two mods I had said I wanted from the very beginning (remember when it was only 2 things?) finally became available, and had enough user reviews, that I picked a winner, and ordered the Frutto Tech keep-alive mod. Into the Twinkie compartment! Until I'm ready to open up the pack to do more work inside...

Image

July 9, 2023

All this stuff is starting to gnaw at me. I can't stop watching YouTube pack mod videos, and I have a bag of parts I've yet to install. So I grabbed a pack of acrylic paint pens and started an easy (ha!) task that didn't involve opening the pack (motherboard side, that is). I "painted" (traced?) the wires into proper rainbow wires, after consulting various reference images and seeing work that others had done, and detailed the cake and interior a fair amount, using those acrylic pens, gold sharpie, silver sharpie, and some silver rub n buff.

Image
Image
Image

Sh%ts starting to get real. and I can't stop...

I'm starting to cave to these mods, faster and faster. Here's a real Dale resistor, that I'll be installing on the side of the Ion arm. I just wasn't thrilled with the look of the gold sharpie in place of the brass on this one. And gold sharpie doesn't last super well, for parts that you're messing with much. Maybe with a clear coat, but since I wasn't done, that hadn't happened yet. Not a concern, when you have the real part. :) (courtesy of GBHQPartsDepot on Etsy)

Image

To be continued in the next post... (when things really start to go off the rails)
RiverofSlime liked this
User avatar
By kman
#4985039
July 5, 2023. YouTube is dangerous.

Watching a bunch of upgrade videos on RSquad911's YouTube channel really got me SUPER hooked on the potential of all these mods, and so many more that I wanted to emulate. Note: I have decided I kinda don't care about *exactly* matching the AfterLife Phoebe pack anymore, although I do still want to try matching it in spirit.

I picked up some black hockey tape from Amazon, and wrapped right over that awful plastic tape on the wand handle. HUGE improvement.

Image

Aaaand I'm now dissatisfied with the stock hose loom... so stiff and annoying! Charlesworth Dynamics has a replacement loom that's SO much nicer. Flexible, coils nicely, etc. And while I had, earlier on, considered simply painting the hard rubber "oxygen hose" part of the stock hose (as a friend did), it's lack of flexibility was getting more and more annoying to me, especially looking at packs with the oxygen hose. I ordered some black oxygen hose from AliExpress. It would be slow to arrive, and black instead of olive, but... it's the spirit of the mod, right? Not to mention the practicality, getting away from that awful stiff "rubber" (aka flexible plastic?) part. Instead of hard to find and expensive Neutrik connectors, I went with CNLINKO disconnects from Amazon. Looking forward to getting all this installed.

July 23, 2023:

I made the mistake of getting back on Facebook after a long hiatus, and stumbled across the HasLab pack modders group. Chris Hunt at DragonWorkshop seduced me with photos of his incredible drop in Cyclotron lid interior kit.

That took me from this stock setup:

Image

... to this:

Image

... just by unscrewing the stock stuff and screwing in his kit, instead. Which looks amazing.

Except now the weathering is totally uneven and weird looking. Some serious weathering is in order.

First, though, I could no longer stand the rubber BNC cables, so, copying a mod someone else did in the Facebook group, I picked up some cheap RCA-to-BNC connectors on eBay, chopped off the offending rubber ends, and drilled into the stock "stubs".

Image

While I was in there, I started the repaint, starting with a simple coat of flat black Rustoleum rattle can (standard 2X stuff):

Image

Here's the end result cable, on that newly-painted surface:

Image

They're just friction fit for now, but I'll probably either hot glue or maybe even E6000 the two of those that free float a little more, as they've worked their way off once or twice.

But first I added the rainbow ribbon cable to the lid interior (amazon buy):

Image

Next up, while everything was still out (or easily removed), I used silver rub n buff to "metallize" the base modules, and my good ol' gold Sharpie for the "copper pipes" (wires?), as the reference photos showed for the interiors. Then I weathered down the plastic a bit with a simple black acrylic wash, along with some burnt umber and raw sienna, to make it nice and grimy inside, and put it all back together. YES.

Image

Image

Aaaaand now I'm hooked on interior upgrades.

To be continued in the next post...
RiverofSlime liked this
User avatar
By kman
#4985040
Still July 2023...

The “Phoebe wires” (I think they’re called?), those copper wires arranged around the Clippard valve? Starting to annoy me. They look really cool at first, but the more you stare, the more you REALLY want to do something about them... so monotone! I had planned to copper tape-wrap the wire ends, and perhaps a little paint effect on the ends, but the more photos I see of people who went real, the more I want to do it right. I can't quite justify spending the money on the *really* excellent Redman kit, so I’ll try to do this myself. I think. I picked up some M3 socket head screws and some plain ring terminals on eBay as an initial step. Not the *exact* size of the originals, but I think it’ll look good. I already had copper tape, but I also grabbed the cable clamps I’ll need (from Amazon). I’m going to do this, I'm just a but nervous to take it on. Mostly because I'm unsure about the finishing needed for the top of the Clippard platform, after the OEM stuff is removed, and the need for bondo (man do I hate that stuff) and substantial repainting and resurfacing of the “base” once the stock wires are removed, since that looks… funky… once they’re out. Just need the wire, now…

Image

Image

Image

Jul 30, 2023

Next up is a small upgrade to the stock speaker, again, inspired by RSquad911's videos. The Dayton speaker has MUCH fuller sound and yet works fine off the stock speaker's connections. I may upgrade further, someday, but we'll see. Next upgrades would need an amp, and now we're talking a lot more complexity and gear.

Image

Image

The oxygen hose tubing I had purchased on AliExpress (CHEAP) finally came in, so since I had finally cracked open the case and brought out the soldering iron for the speaker, while I was in there I decided it was time to do the full hose replacement, and install the CNCLINKO disconnect. I didn’t have time to put the wand-side disconnect on, but since I added quick disconnects on wires EVERYWHERE, in the form of JST connectors, inline, that’ll be much simpler when I get to that.

Image

Image

Image

Image

Image

Image

Image

Image

Photos really don’t convey how much nicer the new hose setup is. It’s just sooo much more flexible and supple as it moves. And since it bends so easily at the oxygen hose, really no worries about the bottom getting messed up if I set the pack down for a moment.

While I was in there, of course, I also installed the Frutto Keep-Alive board. Really plug and play for the connection, not much to show. I mounted the switch in the Twinkie compartment… first of many I’ll have in there, no doubt.

Image

RSquad911 (YouTube) (aka StickyGraphicsCanada on Etsy) has an amazing Cyclotron LED lighting kit. I bought the version that works hand-in-hand with the TacoBelli (Etsy) replacement switch plate/light panel, inside the Cyclotron.

Image

And a shot of the wiring inside of the cake. It's all hot glued in, as was recommended, but I don't *love* the look... I may try to re-do this prettier, someday. We'll see.

Image

That TacoBelli add-in panel was delayed in the mail (thanks, USPS) before I had an event I wanted to wear the full outfit to (Brickfest in Pasadena), so I went for it. I drilled out the stock panel to push the LEDs through. It was a rush job, and I didn’t bother cleaning up the barely-drilled plastic around the LEDs, etc., because they DID shine through and that’s all I cared about. And they still looked fantastic. On the inside. Where no one else could see. But *I* knew it was there, LOL! And... UNF. YASSS...

Image

Now, of course, I really want to show off those lights properly. So faced between spending spending hours cutting out panels in the stock lid, hoping I can do it perfectly and cleanly, and simply buying the reasonably-inexpensive Tacobelli cake topper in resin, so a quick repaint was all that is needed (and some sort of translucent panel beneath it), I caved and bought the resin topper.

Image

I finally caved on real brass fittings, too, after tiring of the wear my sharpie-covered "brass" fittings were getting. And a full set of real hoses, too, to go over those fittings, since that just makes sense (and they're cheap enough, and I'm already paying for shipping, sooo). I picked them up from GBFans (having learned my lesson before... check here first!) and will install soon. Aaand as long as we’re at it, I went for a real Clippard 331 valve, because I can’t stand looking at that oversize top anymore. (Again, all from GBFans). Looking forward to getting these in!

Image

Image

Image

Coming soon to a pack near me!

To be continued in the next post...
Last edited by kman on August 6th, 2023, 11:11 pm, edited 1 time in total.
User avatar
By kman
#4985041
August 2, 2023

I did finally move forward with a super easy $3 upgrade: Those awful shiny silver stock screws. While I had considered just painting them black, it turns out the correctly-sized 14S washers are carried by Lowe's, and $3 buys you 2 little baggies of 6 washers, enough for the everything the pack needs and a few spares. The screws I had on hand (standard threaded network rack screws LOL) are not an exact match but they’re pretty close (a little smaller), and soooo much better than the stock silver screws. At some point if I upgrade to the more accurate ones, since these are thinner screws, that’ll be easy, since this is just an interim step. And meanwhile, way mo’ pretty.

Image

Image

Image

Image

On my list is to convert the button to the snack compartment, too, but for now at least the ones all around the cyclotron are better. (And at least the snack button is black!)

August 3, 2023

The final work I’ve done (to date) is the second main mod I wanted from day 1 (day 0, I suppose): An upgraded battery, to use a Lithium Ion rechargeable battery pack instead of all those D cells. I had picked up a TalentCell 3k model some time ago, with 12v and 5v outputs, but have been sitting on it, trying to decide how I wanted to install it. Plus I didn't want to spent what seemed like an obscene amount on a USB-to-JST connector to actually plug it into the pack's board. I already had JST connectors, and while I had initially planned to just hack up an old dead USB accessory (doesn't everyone just keep those, in case you want to harvest parts?), I decided instead to buy some actual USB boards, in a form factor I was happy with, and solder the JST lines on myself. I also picked up a panel mount barrel connector and plug with pigtails, for easy install into the pack's Twinkie compartment, and so I could then charge the pack from outside without needing to either leave a gaping hole to reach in, strap the battery to the outside, or disassemble the battery pack.

Image

I still need to figure out where exactly I want it, and how I’ll turn the pack switch off and on. But I’m closer, at least.

Coming soon:

GBHQ is an enabler. Real Dale RH25 and RH50 resistors are on the way, as are the SMC 4mm elbows and "Legris" type straight fittings. I mean, I have the 90 degree brass fittings, so it’s silly to not finish and just do the whole set, on both ends.

ImperialTechShopUS has an awesome drop in blue lens, to get rid of the weird milky white layer that HasLab went with on the bar graph. And a great drop in Cyclotron cake lens, to show off my pretty lights better. Could I have cut and ground one myself for a lot less money? Yes. But between getting it just right, lots of runs to Home Depot, wanting it *perfect* and unlikely to get there with the tools I have, this seemed like a reasonable choice... after angsting about it for a good month LOL

And finally, Pierre at RSquad911 had a great pre-done replacement for the wire bundle (with correct reverse spiral wrap) that goes inside my yellow PEX sheathing, using a real PG7 connector, which I will modify (as he did) to use a magnet for easy removal. I had planned to make this myself, but I realized that given what a minimum buy of that reverse-wrap plastic spiral stuff costs, and the connector, I wasn’t going to come out ahead by doing it on my own, so I caved.

The internal debate continues, over doing a full repaint, or just some paint dusting and clearcoat, to try to knock down the plasticky-ness. I have time to think about it still, but that’s going to come to a head before long.

And do I go for the full aluminum motherboard replacement? Hmmm…
User avatar
By kman
#4985046
mike_waclo wrote:Thanks for sharing! It's all looking great!

I also made the trek to LA from Ohio for the first showings at the Chinese Theater... fantastic experience, especially the Friday night viewing that had Jason Reitman on stage for a quick interview!
Thanks! I'm really happy with it so far, even though I feel like I have a loooong way to go. :)

Yeah we were there that show! We were the guys in costume walking around in front before they lets the crowds in. Cool that you were there, too! :) That interview with Reitman was *amazing*. Made me appreciate the film so much more!

Image
SP Productions liked this
#4985050
kman wrote: August 5th, 2023, 8:38 am Yeah we were there that show! We were the guys in costume walking around in front before they lets the crowds in. Cool that you were there, too! :) That interview with Reitman was *amazing*. Made me appreciate the film so much more!
Oh dang, no way... I just scrolled back up and looked at your photo with the faces blurred... I can still totally tell that you're the group we met at Scum and Villainy Cantina afterward!

Image
kman liked this
#4985052
The pack is looking really cool. I think I may have to look into the cnlinko connectors. I like the looks of them better than the neutrik ones I see used a lot. Out of curiosity any reason a 4 pin was used rather than a 2pin one?
User avatar
By kman
#4985059
virusxero wrote: August 5th, 2023, 4:48 pm The pack is looking really cool. I think I may have to look into the cnlinko connectors. I like the looks of them better than the neutrik ones I see used a lot. Out of curiosity any reason a 4 pin was used rather than a 2pin one?
Flexibility, mostly. The two pin one would probably work, but the cost difference isn't significant, and this gives me the option of running an audio cable, or something else, down the road. And finally, I know others have successfully installed this exact one, so there's some peace of mind there, too. :)
Last edited by kman on August 5th, 2023, 10:55 pm, edited 1 time in total.
User avatar
By kman
#4985060
mike_waclo wrote: August 5th, 2023, 3:28 pm
kman wrote: August 5th, 2023, 8:38 am Yeah we were there that show! We were the guys in costume walking around in front before they lets the crowds in. Cool that you were there, too! :) That interview with Reitman was *amazing*. Made me appreciate the film so much more!
Oh dang, no way... I just scrolled back up and looked at your photo with the faces blurred... I can still totally tell that you're the group we met at Scum and Villainy Cantina afterward!

Image
That's right, I remember your group! :D

That was a great night. :)
User avatar
By kman
#4985061
August 5, 2023: A tale of two wins and a loss...

The FAIL:

Today I decided to start installing some hose upgrades. The HasLab stock hoses are actually not terrible at all, and the one piece molded strain relief that is part of the hoses is actually pretty perfectly molded, so I thought I'd try to keep them.

As a test, I started with the one black hose on the left side of the back bottom (viewer's perspective), the one that is supposed to be blue. Easy, right?

Image

The black hose slices out very easily, of course.

Image

These soft rubber connectors are a SERIOUS b*tch to drill out, though. (remember kids, ALWAYS drill a pilot hole first!)

Image

But that's just effort, right? No, actually, I'm not sure there is a good way to actually cleanly drill these things out, not to the degree needed for this mod.

I eventually gave up and used a blade to cut the thing out entirely, spiralling around and opening the sides like the real deal.

Image

Unfortunately, after a solid half hour of messing with ONE connector, it became clear this was never going to work. It just doesn't wrap nicely enough around the tube.

Image

After this FAIL, I punted, gave up on modding the HasLab parts, and and dropped the $10 on the real PG7 connectors from Amazon. They should be here tomorrow, and I'll try again. *sigh*. Could be worse, I guess. Only a partial loss, really, I guess? The real parts are better anyway, so ultimately it'll be an improvement. It's only money... *sigh*

The WIN:

On the other hand, the real brass bits were a freaking JOY to install. I grabbed the right side hose, connecting the HGA to the beam line tube (I think that's the term?), which hose has the brass connectors both top and bottom, to try this out.

Image

The rubber connectors, of course, sliced off cleanly and easily. A quick drill right down the hose, maybe 3/4" deep, and small enough for the connector tube to go in snugly, and then they pushed right in, looking *perfect*. Yay!

Image

The Beam Line tube had an opening that the rubber fit into, and I got lucky... while it's tight, if you have decent grip strength and go slow and careful, it threads right in, no drilling needed! Pro-tip: Make sure you aim the opening in the direction you want, and don't thread past that point once you get around the depth you want. *nervous laugh*

Image

Image

The HGA, on the other hand, needed a little work, but it was easy stuff. There is a plastic nub that the fake rubber part slides onto... that needs to come out. Additionally, I wanted to recreate the Spengler pack placement, which puts this brass elbow slightly above this position.

Image

A hacksaw made short work of the nub, which was fortunately solid... since the hose will be in front of this, I'm not even going to bother cleaning this up. :)

Image

A quick pilot hole, a bigger hole appropriate for the part, and it threaded right in nicely. Tip: Don't go in perfectly perpendicular to the round HGA. Angle it down ever so slightly, else your hose is going to be sticking up and out from the pack more than necessary.

Image

Slide the connector into the pre-drilled hose, and this part is DONE. :D (but for the eventual weathering)

Image

WIN!

While I was at it, I decided it was time for the Clippard valve install. The HasLab one is impressive, for what it is, but it’s a tiny bit smaller (not enough to notice, but worth mentioning), the label isn’t metallic, but most importantly: the adjustment knob on top is visibly and very noticeably too large.

The HasLab one comes off easily, just two screws, showing the mount reinforcement underneath, all of which has to come off.

Image

Fortunately, 99.5% of that comes off nicely with a hacksaw blade, and then it's easy enough to clean it up with a box knife.

Image

The annoying part was getting all the mounting holes right. The basic drilling was easy, but of course the real Clippard mounts are just a teeny bit wider than the fake one, so the screw holes aren't *quite* perfect (but are super close... which actually makes it harder, since totally new holes would be simple, but the same holes just 3/16" moved is a hassle!), and then there’s the little bottom part that sticks below, with a keyed slat. I didn’t want to cut up the real Clippard, so that meant cutting in the keyed notch. A needle file handled that reasonably easy, but getting the new holes widened “just so” was a bear. I ended up using a round needle file to widen the hole in the direction needed, until I could get things screwed in, at which point the job was done. (But for some weathering, clearly)

Image

Image

Real vs HasLab:

Image

I took on two more upgrades today, but after many hours of frustration, neither is totally complete, so updates on that will need to wait for my next post. Meanwhile, I'm going to bed, and the living room looks like a hardware store exploded and my pack is in more pieces than I would have believed possible... yayyy...
User avatar
By kman
#4985089
August 6, 2023

Some real successes, finally, after a frustrating day yesterday. :)

First up, I didn’t get into this yesterday, but my TacoBellli interior LED plate came in yesterday, and I actually did get it installed. I didn’t mention it since I wasn’t able to get the pack back together to actually take photos of it in situ.

Here’s the panel and the lenses that come with it (which fit beautifully into their holes:

Image

All painted up (the panel came with a few extra lenses). It still needs some real weathering but I'm going to hold off and probably do the whole pack all at once:

Image

And the panel inside:

Image

… And finally, installed and on!

Image

I haven’t had a chance to get the replacement cake topper painted yet. I’m still angsting on exactly what paint to use, and I need to sand it a little smoother. (It's resin, but I guess the print had lots of supports because there is a ton of tiny nubs... at least it's resin, so they sand down nicely!) Meanwhile, daytime was scorching hot, literally too hot to paint (some tests came out not great, thank god I tested), and evening was filled with clouds of mosquitoes, so that may have to wait a little longer.

Btw, any suggestions on how best to match the OEM aged copper look, in terms of paint? I have a lovely gold, but I'd be happier with a real copperly look that matched the original reasonably well. I found some copper but I'm not sure it's good enough for this.

Moving on.

ONE of my near breakdowns yesterday had to do with my Dale PH25 resistor. It’s lovely, and has the correct brass base, but didn’t come with a lock nut, so I was stumped as to getting this mounted securely.

Installing it was a bit of an adventure, as figuring out how to remove the ion arm assembly entirely was a lot more involved than I had imagined, disassembling LOTS of the pack. Then I learned the hole needed was bigger than my biggest drill bit (ignoring appropriate wood-drilling spade bits), so I ended up spending some quality time with some files, getting the hole to right size (approximately 5/8”, for those interested). A little minor scraping damage cutting off the original plastic mounting stuff, but that'll disappear once I add some weathering over it.

Image

I wanted to protect it from knocks (and theft… or simply falling out and getting lost!) so I wanted it secure, but I also wanted to be able to remove it if needed, so simple epoxy was out.

Long story short, ultimately I went to Lowes and found that literally the biggest nut they carried, 5/8”, did fit, kinda. The threads didn’t align perfectly, so it doesn't thread completely. Still, it did a nice job of catching the first couple threads and holding tight, so I ended up threading this massive nut on the back side to hold it. For extra security, and to prevent spinning (I hope?) I ended up completely filling inside the nut with hot glue. In theory, I should be able to get this out if I need to, but it should be reasonably secure against accidental loss, I think.

Image

Image

Moving on.

For a long time, I have wanted to upgrade the "split" wire loom on the pack, where fake wires poke out from the side, to replace the rubber bit with real wires for a hugely upgraded look. I took a Dremel to the rubber to cut the wires out... turns out there is a hard plastic piece glued down the center of the molded rubber exterior, so just cutting it out with a razor wasn't as effective as you'd think. Not super hard, but surprisingly more annoying than I would have thought.

Image

Next, drill holes into that plastic pipe at the top and bottom, for the wires to go into.

Image

Arrange the wires to your liking. (Mine are mostly based off the Phoebe pack reference photos, but not an exact match)

Image

…and start cramming them into those drilled holes.

Image

I finished it off with a little electrical tape “repair” wrapping, and cut off that dumb fake ring.

Image

Moving on…

I did some electrical work, which I haven’t photographed very well. It's something of a spaghettii nighmare inside right now... I really need to clean it all up! But I got the TalentCell battery installed inside the pack. I’m still evolving my methodology, but it’s functional, as of now.

Step one: I picked up some USB clamshells and soldered a pigtail with a JST connector to it, to plug into the system board. That's the core thing. But without mounting it outside, or inside the snack compartment (which doesn't work, since I have mounted a ton of things in there), or hacking a big hole to reach through inside, I needed more.

Step two: I also got some 2.5mm barrel connector and panel mount jacks.

The panel mount jack lets me move the charging port to outside the pack, so I don’t have to open the whole thing to charge the battery. But because these are known for leaking current while charging (I’m told), I also put a kill switch inline with the USB > JST connector, and mounted that switch (and the charging port) inside the snack compartment, which let's me *completely* cut power to the board. My compartment's panel is starting to get crowded, since I have the Keep-Alive switch AND the lighting effects switch inside there, too. And perhaps more to come (smoke?). But for now, it works. And the D cells are a thing of the past…

Image

Moving on. Up next, the hose upgrades, with PG7 connectors.

My PG7 strain relief doodads came today (yay for next day delivery!), so this part is finally cooking nicely, albeit not completely done yet. But these things look great! They’re not 100% identical models to the screen used ones… they seem a little more squared off and less rounded. But they're still the right type, and "good enough," especially at this point. Who knows, maybe someday I’ll swap some or all of them out, if the exact match ones turn up.

Image

Getting the darned tubes off was a bear, as others have warned, as the two screws are in a nightmare area to access. And there’s no easy way inside to use the back screws to hold the strain relief in place from the inside, as I had hoped. The seam for the two halves splits right across the opening, grrr. So I ended up actually tapping and threading the holes and screwing the connectors in. This seems to work pretty well, though, and the plastic is just thick enough this appears to hold nicely.

Image

At the bottom of these two short side hoses, of course, they don’t use the whole connector. Screen used drilled right into the little bump-out, but I don’t think that will work here. So I cut down the strain reliefs to the part that is supposed to be exposed.

Image

It turns out this works quite well. The hoses themselves can be stuffed into the little slots that the original connectors used, and are tough enough to move that I’m going to try leaving them like this and see how it goes. If there’s a problem later, I can tear down the pack (again), get into that little bump (which appears to be screwed in from the inside, so access should be ok?) and run a screw down the hose itself, which will lock the hose inside, and just a little bit of glue should lock down the strain relief piece, outside. Meanwhile, I’m good for now:

Image

The next replacement was a little trickier… the PPD. On the bright side, upon close inspection, it turns out the PPD is a fully separate piece, and is simply screwed in, from the inside, and easily removed. This is especially great because I’ve been meaning to paint it anyway, and having it off made that sooo much easier.

The connector goes into it at an angle, which is super weird. I had thought maybe I could shave it down, and insert it, and use the retaining ring from inside, but there’s no good way to get inside for that. And the inset hole is not just a hole, it’s a molded, enclosed, inset cylinder, so going inside seemed questionable. I ended up dremeling the PG7 connector down at an angle, and just friction fitting it inside until I was reasonably happy. I’m going to glue it in place with some E6000 once it’s all worked out.

Rough shots, partway through the fitting process:

Image

Image

Then I masked the sticker and gave it a quick coat of silver (Rustoleum rattle can “Aluminum”). This will look great once I add weathering on top.

Image

Side by side with the OEM part:

Image

And the other side rough position:

Image

I’m not going to finish the other end, into the HasLab rubber Dale resistor, as I have a real Dale resistor en route. So I’m holding off until that’s in hand. But very pleased with this progress so far.

All in all quite a productive weekend, I’d say!

More to come, but this coming week is going to be hell at work (moving… AGAIN), so things will likely slow down for the next week or so, but we'll see. Lots more to do. And decisions to be made. (Biggest decisions: What cable clamp, so I can finally install that GB1 cable, and which Ion Arm cap to go with?)
Nighty80 liked this
User avatar
By kman
#4985588
Well, life got busy for a bit, but I finally had some time (and some clear weather... oddly difficult lately, for SoCal) to work on the pack again! I got some goodies in the mail, so let's get to it!

First up, my order from GBHQ came in: More real Dale resistors (RH25 and RH50), 4mm SMC Elbows (since real Legris connectors are pretty much unobtainium now?) and brass 3/8" x 1/4" compression unions.

Image

And my ribbon cable clamps came in, from Heavy Props.

Image

I also picked up some brown wire for the rats nest around the Clippard valve. I haven't decided if I'm entirely satisfied with the color match, so this may be on hold for now.

Image

Oh, and hey! I was digging around in the garage and came across an old Radio Shack SPL Meter I had forgotten I have. It's not the exact same model as the one used on screen (theirs is more squared off, not rounded like this), but it is likely "close enough" for some fun. :)

Image

BUT let's get started.

August 27, 2023:

Finishing off the Cyclotron interior has been a big concern for me... I LOVE the LEDs, but they really need the windowed cake lid to show them off properly. And I even bought the resin model from Tacobelli (first pictured in my July post above), so it should be nice and smooth. But painting metal tones that match is always super dicey, especially if your skills are less than Pro, or even "Advanced Amateur". I tried a couple different rattle can tests... a gold metallic paint came out best by far (and I've seen a lot of packs with this mod use that, probably for that reason) but I REALLY wanted to try to hit the copper tones of the stock setup, so I crossed my fingers and tried "Krylon Premium Metallic" "Copper Brilliance". It only came out "ok" in the test, but I was hopeful... the test sprays had been on INSANELY hot days, so maybe more modest temps would help?

Interestingly, I somehow accidentally NAILED it on the first go. I gave it a coat of satin black primer first... I somehow recalled reading that many metallics do best on a good black surface (especially chrome, but maybe that would carry over?) I wanted a good primer layer anyway, so I went with that. No problem, of course. Then the copper. The copper went on kinda... gritty? But once dried, I rubbed it down with paper towels and some old cotton undershirt rags, and it smoothed out beautifully. The photo doesn't do it justice but it looked *really* good, just like dirty real copper.

Image

There was only one thin coat, of course, which worried me... and some areas showed a little more black from underneath than I liked. So naturally, I screwed up this beautiful thing. The second coat went on even more gritty. But didn't smooth out quite as nicely once dried. *sigh* Tolerable, though, especially once weathered and such. I hoped?

More coats, no bueno:
Image

Rubbed down a bit, though... while nowhere near as dark, the color tones seemed like they worked, so perhaps it'll be ok once weathered?

Image

Fingers crossed, I hit the "wires" with acrylic paint pens again, and used silver rub n buff for the metal plates, and gold acrylic pen to give the screws a bit of contrast (brass screws make sense, right?), and then clear-coated the whole thing.

And then disaster struck... while trying to move the painted piece, immediately after a nice thick clear coat had been applied, it overbalanced and FELL inside the filthy painting box it was in. Crud immediately stuck to the very wet clear paint, and trying to rub that off before it dried solid into the finish took off some underlayer, too. ARGH.

BUT. I wasn't about to repaint the whole thing right now. Or say screw it and order another topper and start from scratch. We'll see how it looks once some weathering dirties it up. Fingers crossed... again.

Image

Moving onto the SMC / Legris connectors.

Image

I decided to paint them gray (Rustoleum 2x Stone Gray, my go-to for a medium gray), and I'll dirty them up good once installed.

Image

The other end would attach to the outer cyclotron cover, as a starting point, so I have to saw off the plastic nub that the OEM connector slid over. A hacksaw made quick work, and I cleaned it up a bit (after this photo) with a utility knife. Doesn't have to be perfect when I'm about to drill a big hole anyway.

Image

Fairly frustrated and worried, I called it a day.

Baby steps, right?
User avatar
By kman
#4985589
Life stayed busy up until Labor Day weekend, when I finally had more time to work on things.

Meanwhile, I got a few more fun things in the mail.

I got blue LED lens replacement, for the pack's power graph thingie, and a clear lens for under the newly-exposed cake. I had sort of thought I might wing it, but decided I didn't need the hassle of trying to cut a perfect circle in acrylic (and notches, etc), when people who have the right equipment can do it for me, for a fairly reasonable price. So Imperial Tech Shop got some of my money, and they looked great. :) (No before pictures, sorry)

In the Facebook group, a guy named Glasone Torres did a run of resin-printed replica heat sinks, with real copper wiring and chips, all pre-weathered and everything, and mine came in. Looks great! Can't wait to install it... I thought I had the right screws, but NOPE. Time to restock... Amazon will have some more to me tomorrow, so there's that.

Image

Aaaand I picked up a pre-made wire assembly for the line that comes off the Cyclotron (in front of the ribbon cable) from the RSquad911 guy's Etsy shop. I could have made one, but honestly sourcing the reverse-wrap spiral wrap and PG7 connector, and wires, and research... I would have paid the same or more, and had to spend more time I didn't have working on it, and I'm getting to the point of wanting this done so I'll throw money at problems LOL.

Image

But new toys got me excited again, nonetheless, so here's a little more progress:

September 1, 2023: Picking the Red Wire (hose)

I took the painted SMC connectors, and the brass compression unions, added the red hose from GBFans, some 3M electrical tape, and moved my hose clamps over from the stock hose, and thus recreated a hose with all accurate parts. :)

Seeing them side by side like this, you do appreciate what a great job HasLab did, but there's still no beating the real deal.

Image
Image

I carefully drilled (don't want to go through the inside cover!) and tapped the side of the cyclotron cover (where I had cut off the nub at the end of the last post)

Image

Aaand the first connector was in. :)

Image

Moving onto Red Hose #2, which comes down off the HGA:

Image

Whack off that stock nub:

Image

... and drill, baby, drill! (nothing inside the HGA to worry about)

Image

Tap the hole, and boom, we have two mounted. :)

Image

Now's where I shift gears and move onto the Dale resistors. At some point I might fill the recess the stock fake rubber ones utilized, but I'm not there yet. But resistors first, because that's where the hoses connect to, on one side, for a lot of these next upgrades.

Image

The real Dale RH50 resistor fits like it was made for it (seriously, good job HasLabs), so whack off the post, two quick holes and two M3 socket head screws later, I have a resistor mounted.

Image

NOW, I can finally finish that hose I started a couple weeks ago. Cut off the base of the PG7 connector to make it match refs and snug right up to the resistor. The hose friction fits over the little metal connector quite nicely... maybe I'll add a dab of E6000 in the future if it seems to want to move, but for now, it seems good.

Image

Then the brass air elbow goes on top of the ion arm, another short bit of looped hose, and another mod is fully complete. Loving this progress!

Image
Image

This is getting repetitive now, but the third SMC connector goes under the ion arm, same basic process as the others above:

Image

Aaaaad the Dale RH25 resistor went onto the other side of the ion arm just as easily:

Image

Going back to the hoses, the same process applied for the ends that go into the ... base behind the PPD? Not sure what that part is called. But the two red hoses terminate in there:

Image

Getting the hoses all connected and mounted and things are coming together nicely:

Image

Image

Not a bad evening's work. :)
User avatar
By kman
#4985590
September 2, 2023: Picking the Red Wire (really)

And now we circle back to an issue I left unresolved, previously: The battery pack.

My TalentCell was mounted inside the pack with Velcro, and I extended the 12v port to the snack compartment so I can charge without opening the pack. I even installed a kill switch, cutting power between the battery and the board's power input, to make sure there's no electrical backfeed into the board while charging.

The one thing I didn't do is figure out a way to actually turn the battery pack OFF. I had the pack positioned so I could see the LEDs inside the pack, peeking through the holes left by the stock shoulder straps. (there's a little curved cap that comes off with a couple of screws, letting you actually see inside... and in the darkness of the pack, the LEDs are clearly visible). But I couldn't really reach the switch actually turn it OFF.

Interesting, roughly 3 weeks of being "on" (and I think the kill switch had it fully isolated from the pack electronics) and the battery still showed 3 of 5 LEDs of charge! Still not an ideal state. I wanted to be able to turn that OFF.

Disassembling the power pack (it's just 4 screws) shows the batteries themselves, with a little charging circuitry mounted right on them, plus a separate circuit board where the components are mounted.

Image

The switch was not going be relocated easily, unfortunately... it was very well soldered through the circuit board with wide blades. I actually tried piggybacking off the backside of the board, so I could install another switch in parallel, but it was REALLY awkward trying to solder in that enclosed space, onto a board with live power attached. I gave that up, and instead decided to cut the red wire (again, LOL).

I drilled two small holes in the front of the case, to get into that wire, cut the red wire, and brought in the ends of a JST connector. This way I can still remove all this whenever I want.

Image

The JST connect's mate was extended to reach the switch, which I (again) mounted in the snack compartment. That thing's getting full!

Image

And the battery pack stays safely nestled inside the pack (A disk of industrial velcro holds it in place):

Image

So flipping that "Batt" switch cuts off the TalentCell batteries from any power, COMPLETELY. It's the ultimate Kill switch. The other "Kill" switch in the compartment cuts off the pack's circuitboard from the power (for charging backfeed purposes), but since the actual switch on the battery itself is always on, to truly turn it OFF, I can cut the wire inside the unit completely to actually turn it off. (Interestingly, this might let me use the battery pack for powering other things, while the rest of the pack is off and out of the loop.) The new "final" kill switch (Batt) just turns off the battery completely, for longer term storage, without needing to remove the battery pack. (Especially important since I have to take the whole backplate and Alice frame off anytime I want to get in there, ugh)

At some point I'll do something more interesting inside that snack compartment, but it'll do for now:

Image

Oh, and while I had the pack open and was working in the snack compartment, may as well open it up more to get to the bar graph. Remove that odd milky white plate:

Image

... and replace it with the nice clear blue plate, and one more mod is complete:

Image

Image

With the pack back together but still open, the procrastination excuses have run out: It's time to tackle the ribbon cable.

I removed the P clamp so I could free the stock ribbon cable, and the yellow wire mesh cable, disconnected it all from inside the pack, and got out the HeavyProps clamp.

Image

I traced the curve, trimmed the cable end to match, marked where the holes hit, and used my leather punches to make nice neat holes for the screws. Oh! I also weathered the cable a bit at this point... once it's twisted, that's NOT going to be easy to get it evenly (or perhaps more accurately "purposefully haphazardly"? LOL). I just hit it with black spray paint randomly and immediately wiped it down, repeat until satisfied. I wish I had a shot of the cable after weather. :/

Image

I removed the cable disconnect switch from it's mounted location, and went for it. The screws actually fit right through the stock HasLab square holes, that the stock clamp used, so no drilled was needed. (!)

Image

The pack is pushing the screws at a bit of an angle, but I *think* it's ok. And being honest, I'm not entirely sure what can be done about that. Shorter screws, maybe, so they don't hit the pack sides? Not sure. I'll live with it a bit and see. Since no hacking or drilling was needed, I can always go back later.

Image

I needed to deal with the other wire, the yellow mesh wrap assembly, before closing anything up, so consulting reference shots, I hacked off the end of the PG7 connector a bit, and fed the wires in.

Image

I also cleaned up the end of the yellow mesh, and singed + glued the end a bit to prevent future fraying. The PG7 connector, amazing, has a perfect friction fit inside the stock hole, so I don't think I need to do anything else with it!

Image

With all the wires in place, I could finally put the twist on the ribbon cable, and feed it all back inside the pack. It's a tight fit so I don't think I need to worry about it coming out. The yellow mesh bit actually fit under the OEM cable clamp pegs pretty nicely, and the few inches of extra ribbon cable seemed to overflow into the compartment to the side just fine. I'll revisit the issue if needed. Once inside and I was satisfied, I gather it all back into the P clamp, screwed that back down onto the ladder, and ... that's that. Wow. I feel like maybe the ribbon cable should be a bit tighter, but I'll see what others think, and live with it for a bit, before I go back in and mess with it. Maybe it's good enough and I shouldn't overthink it. Thoughts?

Image

Here's a shot of the inside, before I seal it up again:

Image

And a terrible shot of the overall pack, before putting pack the motherboard and pack frame. Sorry, it was late.

Image

Oh I forgot to mention, I finally picked up the right sized screws for around the outside of the pack bottom, and swapped out the temp ones I had (slightly too small) with proper ones. Small difference, but happy-making. :)

Image

Long day, late night, called it here...
User avatar
By kman
#4985591
September 3, 2023: Mild Weather(ing)

Lots done the prior two days, so today was simpler. Close it all up, and give it at least a little weathering.

I weathered the cyclotron cake topper so it could all close up properly-like. Oh, and that clear window insert... I basically drowned it in watery black acrylic, giving it a filthy smoked look. I think I'm happy with that, but we'll see. At least I don't have to open the whole pack if I decide to play with that more LOL.

I weathered that silver PPD so it was less glaring. A little grime on the cables and electrical tape, and too-new brass connectors.

I need to do a lot more weathering. But at least the lack is no longer screaming at me LOL

(Some photo weirdness is making the silver cable clamp look BLACK, because it's definitely not... and that's definitely the new cable... super weird!)
Image

Here's a quick snap of the full pack as she stands:

Image

I hope to get that heat sink mounted soon (like tomorrow), and then the last "urgent" upgrade is the ion arm cap and antenna. I finally made a decision on that, and ordered one from Ben of Kent. That'll probably take a month to get here, but at least it's in progress.

After that it's little things, and major things that I may or may not do. The wire nest around the Clippard valve. (kinda major?) A full pack repaint? (definitely major) I saw some interesting ideas to mod the release button on the snack compartment... I may play with that. Smoke kit? Probably not but maybe someday? Else I'm actually winding down a bit. I doubt (famous last words?) I'll go for the full aluminum motherboard upgrade. Partially because that will make me want to do the side cutout mod, and that's a LOT of work...

I'll mod the wand side handle with the CNLINKO disconnect, as well... and maaaaybe a few other minor wand mods. I've not messed around with the wand much, to date, so there may be more there, or I may leave it mostly as it is. Metal banjo, some LED upgrades, maybe a wood handle upgrade? We'll see.

I have more plans for my PKE meter (motor mod) and goggles (full repaint, maybe some metal bits) as well, but perhaps those should go in another thread... (subforum)
By tobycj
#4985593
kman wrote: September 4th, 2023, 1:53 am First up, my order from GBHQ came in: More real Dale resistors (RH25 and RH50), 4mm SMC Elbows (since real Legris connectors are pretty much unobtainium now?) and brass 3/8" x 1/4" compression unions.
They used SMC elbows on the Afterlife packs, so you're all good on that front! :)
kman liked this
User avatar
By kman
#4985603
September 4, 2023: Low Energy Labor Day...

The cold that kicked my behind continues. Only minor progress today.

I got my M3 socket head screws in (yay!) so it was time to install my heat sink upgrade (yay!) which means opening the dang pack ONE MORE TIME (boo).

On the bright side, the HasLabs board comes out with one (admittedly REALLY hard to get to) screw.

Image

Image

The one annoyance is the raised ring that the screw set into, which has to be lopped off. Why would they do this?

Image

IMPORTANT SAFETY TIP, for anyone doing this mod with this board: Don't center it exactly where you would normally want to. If you do, the bottom screw ends up going through that open slot, and unless you want to use really big washers and nuts inside, that's not going to work out, especially with small M3 screws. So you'll want to move it up high enough to miss that slot. Ask me how I know. :-x Fortunately I caught it after just drilling one middle hole, so oh well, what's one more hidden hole?

Image

After that, it's all easy going. Love this!

Image

At this point, I'm running low on small, descrete, low energy / low committment mods, so looking over my pack, I noticed that stupid wrongly-rotated sticker on the HGA, and decided to try to fix it. To my surprise, it peeled off fairly cleanly, and stuck back down (rotated 90 degrees) just fine. Yay! One small OCD fix down!

Image

BUT, now staring at those plastic quarter rounds, got me thinking, so I checked my stock, and turns out I had exactly 4 rusted up quarter rounds left in my stash... it was meant to be!

A little hacking, a little drilling, a little tapping...

Image

... a little minor cleanup (black acrylic works wonders to cover plastic goofs), and this one is done, too. :)

Image

And now I rest...
SP Productions liked this
User avatar
By kman
#4985721
LatCar wrote: September 10th, 2023, 12:50 pm Kman did do anything to the copper wires.
The ones around the Clippard valve, or the ones on the heat sink?

I plan to replace the wires around the Clippard with real ones, and have most of the material needed in hand, I just haven't had time to deal with it yet. Hopefully in the next week or two, else I have a trip planned and it'll be like a month before I can work on it again. It's more of a pain than JUST replacing the wires, since there are holes that have to be filled and painting to restore the area to normal, once the stock wires are pulled, before you can really install the new ones. Sort of why I've been dragging my feet on getting that one done.

And I'll replace the stock Clippard valve screws with socket head screws, too, while I'm at it.
User avatar
By kman
#4985910
My Ben of Kent ion arm cap and antenna came a lot faster than I expected, and looks fantastic. Copper rods, yo!

I went knurled on top, GB1-style, even though I'm not sure if that was present on the AfterLife packs or not. (none of the photos have the right angle to conclusively say!) Because I like it.

Install to come, when I have time...

Image
#4986208
kman wrote: August 5th, 2023, 3:20 am July 5, 2023. YouTube is dangerous.

Watching a bunch of upgrade videos on RSquad911's YouTube channel really got me SUPER hooked on the potential of all these mods, and so many more that I wanted to emulate. Note: I have decided I kinda don't care about *exactly* matching the AfterLife Phoebe pack anymore, although I do still want to try matching it in spirit.

I picked up some black hockey tape from Amazon, and wrapped right over that awful plastic tape on the wand handle. HUGE improvement.

Image

Aaaand I'm now dissatisfied with the stock hose loom... so stiff and annoying! Charlesworth Dynamics has a replacement loom that's SO much nicer. Flexible, coils nicely, etc. And while I had, earlier on, considered simply painting the hard rubber "oxygen hose" part of the stock hose (as a friend did), it's lack of flexibility was getting more and more annoying to me, especially looking at packs with the oxygen hose. I ordered some black oxygen hose from AliExpress. It would be slow to arrive, and black instead of olive, but... it's the spirit of the mod, right? Not to mention the practicality, getting away from that awful stiff "rubber" (aka flexible plastic?) part. Instead of hard to find and expensive Neutrik connectors, I went with CNLINKO disconnects from Amazon. Looking forward to getting all this installed.

July 23, 2023:

I made the mistake of getting back on Facebook after a long hiatus, and stumbled across the HasLab pack modders group. Chris Hunt at DragonWorkshop seduced me with photos of his incredible drop in Cyclotron lid interior kit.

That took me from this stock setup:

Image

... to this:

Image

... just by unscrewing the stock stuff and screwing in his kit, instead. Which looks amazing.

Except now the weathering is totally uneven and weird looking. Some serious weathering is in order.

First, though, I could no longer stand the rubber BNC cables, so, copying a mod someone else did in the Facebook group, I picked up some cheap RCA-to-BNC connectors on eBay, chopped off the offending rubber ends, and drilled into the stock "stubs".

Image

While I was in there, I started the repaint, starting with a simple coat of flat black Rustoleum rattle can (standard 2X stuff):

Image

Here's the end result cable, on that newly-painted surface:

Image

They're just friction fit for now, but I'll probably either hot glue or maybe even E6000 the two of those that free float a little more, as they've worked their way off once or twice.

But first I added the rainbow ribbon cable to the lid interior (amazon buy):

Image

Next up, while everything was still out (or easily removed), I used silver rub n buff to "metallize" the base modules, and my good ol' gold Sharpie for the "copper pipes" (wires?), as the reference photos showed for the interiors. Then I weathered down the plastic a bit with a simple black acrylic wash, along with some burnt umber and raw sienna, to make it nice and grimy inside, and put it all back together. YES.

Image

Image

Aaaaand now I'm hooked on interior upgrades.

To be continued in the next post...
Please, god, buy a Harsin3D grip. not only because it's beautiful but also because it supports Randall (luckily a buddy of mine from before he started selling the grips :D) Also, the grip I recommend is the rear rounded, all it takes is cutting off the awful green tape and it's just a snap on 3d printed part. If you want, you can paint/sand it, but I'm running it unpainted, it's still comfy.
#4986209
The_Y33TER wrote: October 2nd, 2023, 7:54 pm
Please, god, buy a Harsin3D grip. not only because it's beautiful but also because it supports Randall (luckily a buddy of mine from before he started selling the grips :D) Also, the grip I recommend is the rear rounded, all it takes is cutting off the awful green tape and it's just a snap on 3d printed part. If you want, you can paint/sand it, but I'm running it unpainted, it's still comfy.
To be fair I don't like Harsin3DPrinting's grips. The weave tends to fray and break apart and the rounded grips are oversize. I think Harsin is low quality compared to the other grips available on Etsy now.

Image
#4986263
One time wrote: October 2nd, 2023, 10:01 pm
The_Y33TER wrote: October 2nd, 2023, 7:54 pm
Please, god, buy a Harsin3D grip. not only because it's beautiful but also because it supports Randall (luckily a buddy of mine from before he started selling the grips :D) Also, the grip I recommend is the rear rounded, all it takes is cutting off the awful green tape and it's just a snap on 3d printed part. If you want, you can paint/sand it, but I'm running it unpainted, it's still comfy.
To be fair I don't like Harsin3DPrinting's grips. The weave tends to fray and break apart and the rounded grips are oversize. I think Harsin is low quality compared to the other grips available on Etsy now.

Image
That is fair. If you're having any issues with a grip you should reach out to him, a buddy of mine had a break in his grip (he dropped his wand :( ) and he dmed him, got the problem solved quick.

I contemplated getting laser cut aluminium but[…]

Hi, do you know when your instrument bars will he […]

Does anyone still have the .apk for it ?

I totally forgot Alex Brewer also did a fan concep[…]